Can you believe, I was getting lash extension refills every four weeks for over 10 years? It is the one beauty regimen I was religious about over nails, hair cuts, facials, all of it!
This Safe at Home period has left me feeling naked without my beloved lashes! But I have to admit, my lashes did need the break as they became so thin and unhealthy from the years of extensions glued onto them.
While on most days, it’s fine not to have eyelashes, I do want to get dressed and feel like myself sometimes. More importantly, we will be going back out into the world soon, whether it be on more frequent Zoom videos or back to the office. How and when remains to be seen, but I don’t want to have to rely on professionals for my beauty care while I wait, nor do I want to be waiting in the long line of people who want service when the world opens up again.
So, I’ve perfected my false lash application regimen to give me the full lash look I want. It’s inexpensive, easy to apply, takes me 5 minutes per eye tops, and makes me feel pretty. I’m sharing my process with you so you can achieve this natural, beautiful, full lash look yourself!
Easiest Strip Lashes During Quarantine
I’ve tried lash strips, individual lashes, flares and trio lashes. I’ve tried different types of glue (even the super-glue-like type made for professional individual lash application.. eeek not recommended). I’ve tried lashify. And I’ve tried the magnetic lashes! In experimenting with the various types of false lashes, I’ve found that simple is best.
The most natural look I can get without damaging my existing lashes is to use good old false lash strips. But the type of lashes and application products I use make all the difference.
Tools For Getting a Natural Look with False Eyelashes
Shopping List of False Lash Products
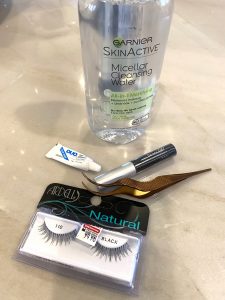
You’ll need strip lashes, lash application tweezers, lash glue, and micellar water for your lash care products.
Let’s go through them one by one:
Lashes
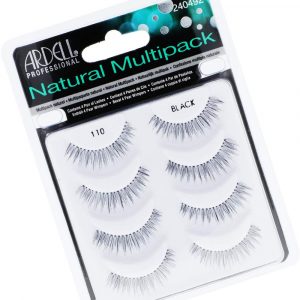
Ardell Lashes: This brand and type of lashes (natural) is the best I’ve found for ease and natural look. They are my favorite in regards to the combination of price/quality/availability. This type and brand of lashes looks most natural as well. I’ve never understood the point of having very fake looking lashes. Similar to fake boobs! What is the point to having them if everyone can see they are fake?
Tweezers
When you use the right tools to hold your lash and apply them, you will see how much easier it is to get the lash on the exact part of the eyelid you want. This is an important tool to have when using false lash strips.
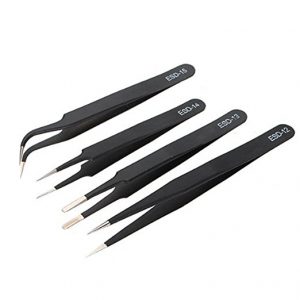
These Lash tweezers can be found online via Amazon. The ones in my picture above were from Lashify with my starter kit and $65 – I don’t recommend spending that much!
Lash and Eye lid cleaner

Micellar Water is a gentle makeup remover you can use on your lashes as well.

Eyelash Glue
This glue is my favorite to hold lashes in place without damaging my existing lashes. I also like how it doesn’t get clumpy. It stays on well but with steam, removes easily. I like the eyeliner glue choice best, which has less mess, but either type works great! And whether you use black or clear is based on preference.
Directions to Achieve the Natural Look with False Eyelashes

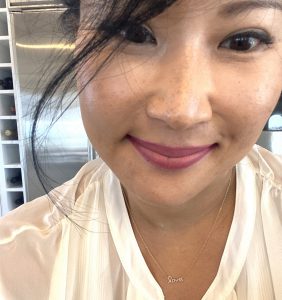
One side has lashes on, one side doesn’t! What a difference!
Cut Lashes to the Length of Your Eye Lid
Before placing the lash on, take a look at the length of the lashes against your eyelids. If they are too long, cut a bit off the fuller end (thinner end is for the inside of the eye which you’ll want to keep short.)
Apply Glue on Your Lashes and Lash line
This is important, I apply a thin line of glue on my lash line (note: the box says this is dangerous for your eye.) I also apply some glue onto my real lashes. The eyeliner glue makes this so easy! If you feel uneasy about applying the glue directly onto your eye line, just put it directly onto the fake lash line instead.
Let Glue Dry Before Applying
The trick with the glue is to let it air dry for about 1-2 minutes before placing the lash on your lid. This air dry time allows the glue to become tacky and will lead to a more secure hold when you place the lash on your eye using the tweezers.
Placement of Lashes
Place the lash as close to your eye line as possible. Start from placing the center onto your lash and use your tweezers to secure the glue onto the lash into place. Once it has a good hold, move to each end and use your tweezers to clamp the false lash together with your real lash and hold for a few seconds.
Press Lashes Together with Your Natural Lashes
Once the lash is on the eye on the middle point and each end, press your existing lashes with the false ones together, so the lashes are sticking together. This way, you have a secondary hold on the lashes in addition to the endpoint on the eyelid.
Apply Eyeliner at the lash line
This last step is optional, but I like to finish off my lashes with eyeliner to hide any sign of lash glue or lash seam.
That’s it! They will stay on all day and look 100% natural. I take them off with a bit of micellar water on a q-tip and then clean the glue off the edges with the micellar water so I can use again. These lashes last me about 5 wears.
What do you think? Enjoy your lashes and let me know if you find any other tricks to help you get your false lash look!
And as always, I’d love for you to subscribe to my blog to get notifications of new posts. Take good care and see you soon!
Here is a video of me talking about the above info!
https://youtu.be/1rBvWNGikDo