
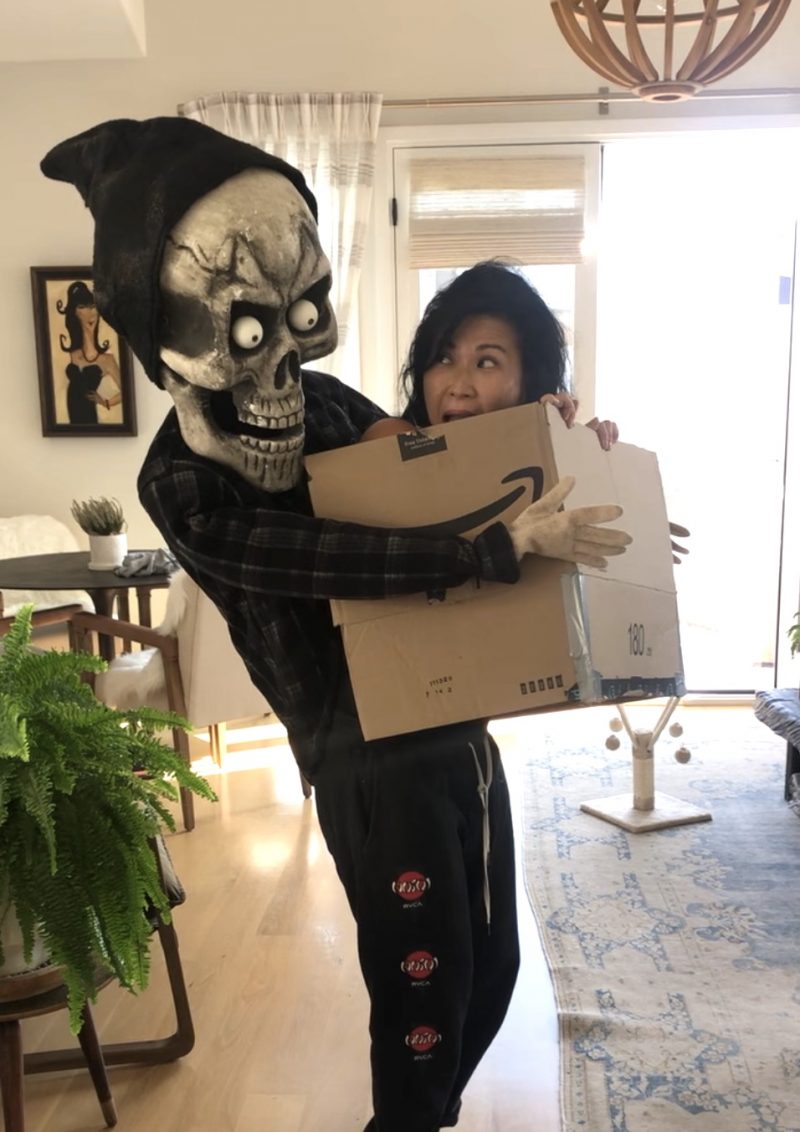
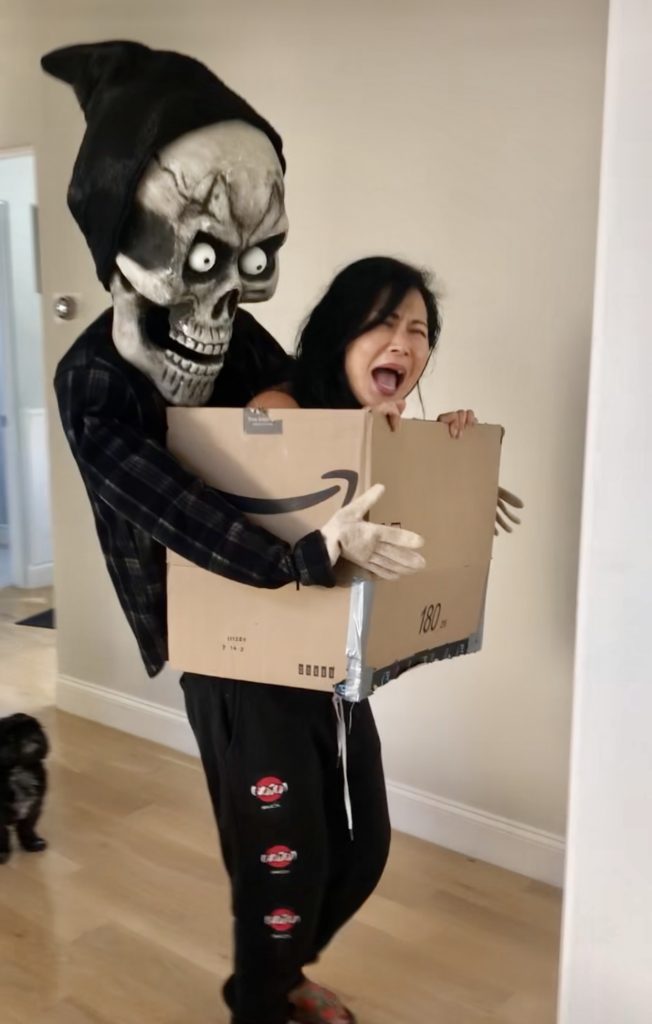
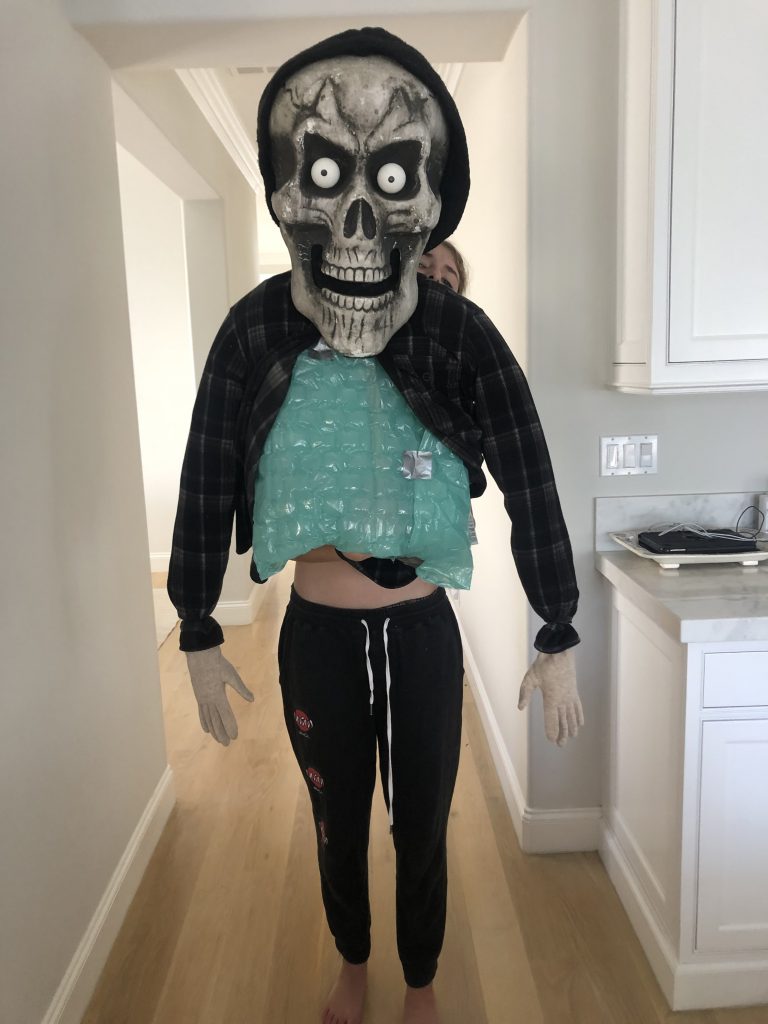
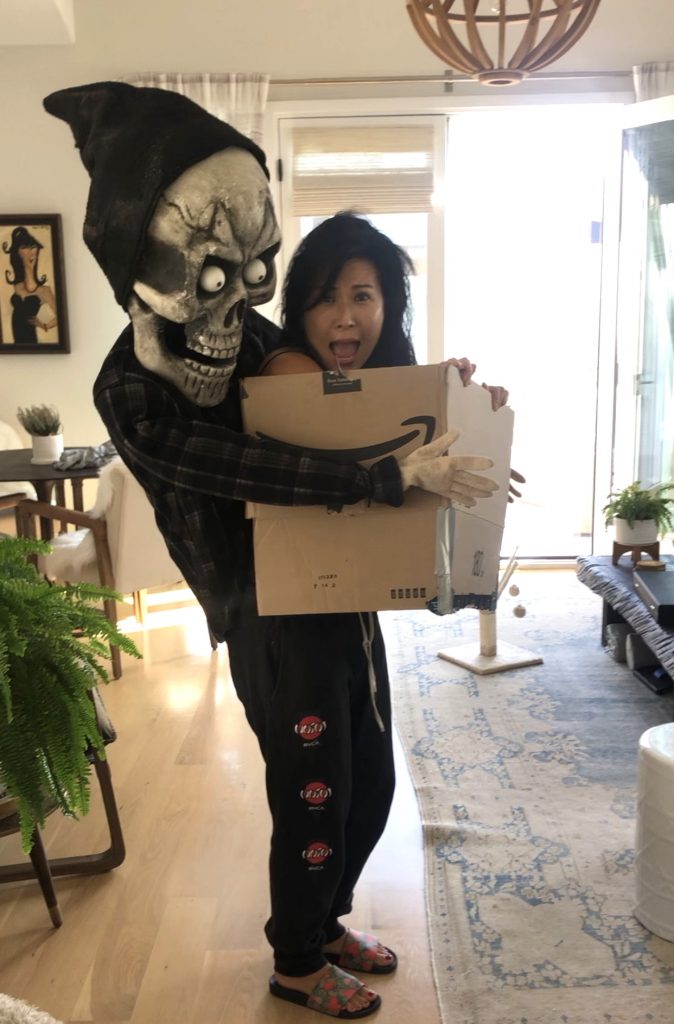
I guess Halloween is canceled this year. There may be no trick or treating, but I’m still going to have fun! We can’t stop living life. Even if you’re just dressing up at home with your family or sitting in your yard, have fun. My DIY Head in a Box Illusion Costume is the perfect thing for you to wear this year. You likely have everything you need in the house, it takes only an hour to make, and it will make everyone laugh… including you!
Lots of pictures here, and we took shots as we were perfecting the costume, so just send me a message if you need clarification on any steps.
DIY Head in a Box Illusion Costume Directions
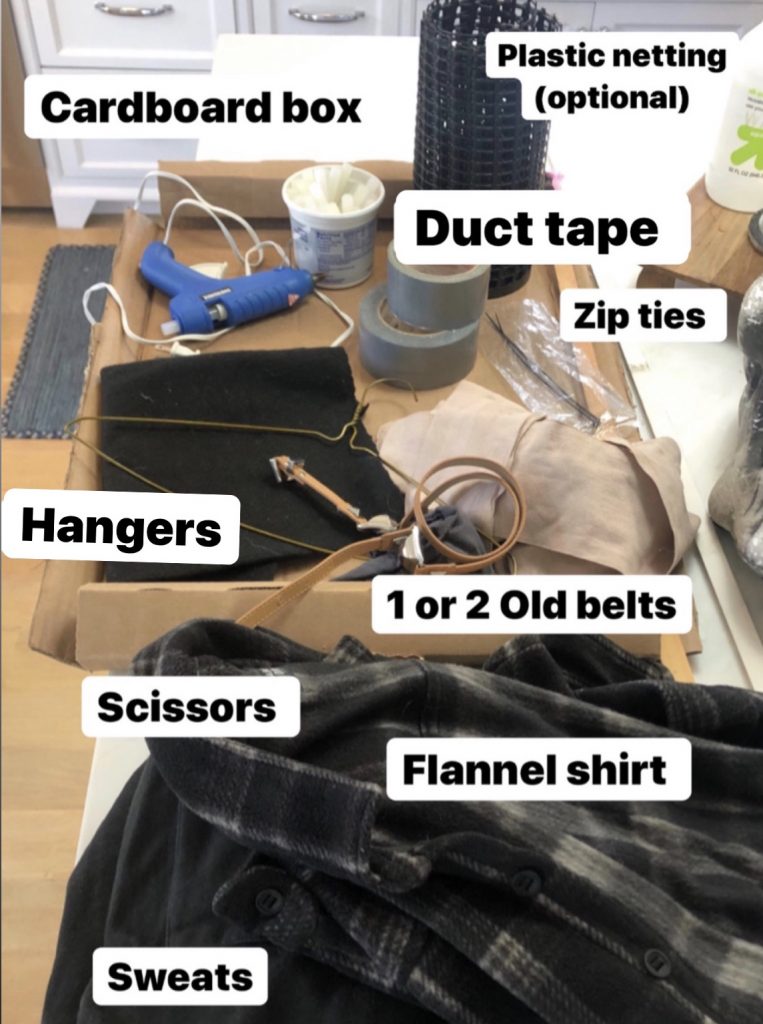
Supplies Needed
I did not have to buy one thing for this costume, everything was sourced from my house!
- Scissors
- Duct tape
- Zip ties
- 3 Wire hangers
- Glue gun. We did not use one but, if you feel like it helps – why not!
- 1 or 2 old belts. If you don’t have extra belts, try Ace bandages.
- Plastic netting to help with the body structure (if you have) if not, just double up on the body structure with extra bubble wrap.
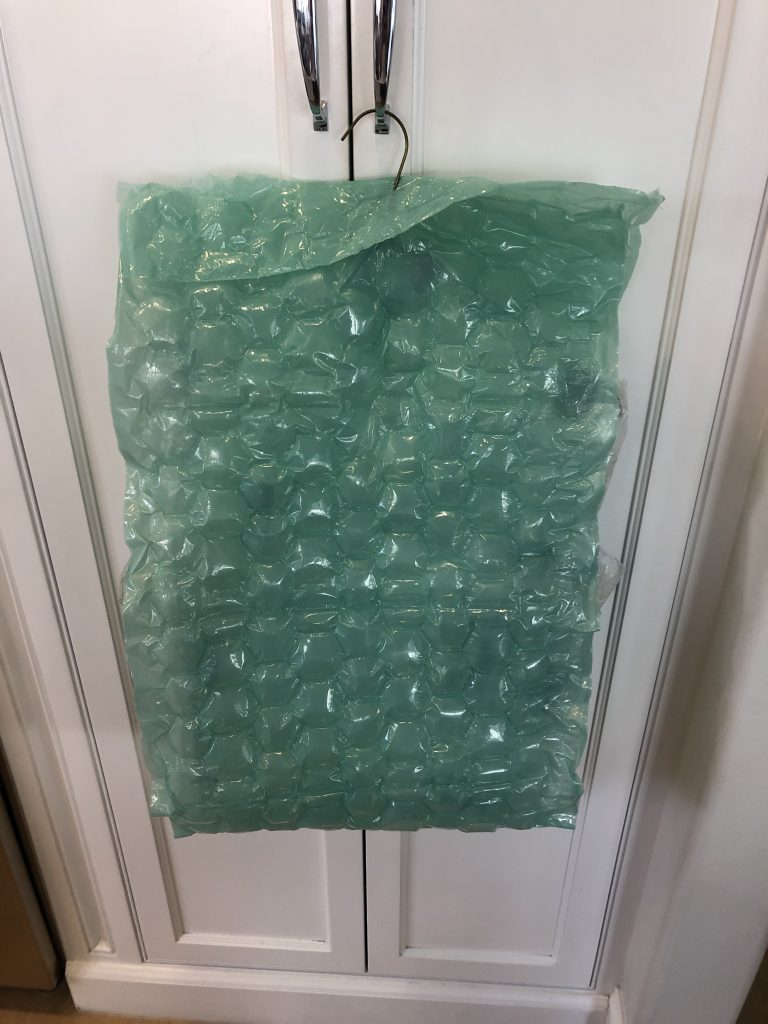
- A good amount of bubble wrap for body and arms (you can also use news paper for arms and gloves)
- Stick for “spine”. Make sure it’s long enough to go to the base of the head, down your back, to about your hips.
- A Styrofoam scary head.
- A box big enough to fit around your body. You will need to be able to step into the box.
**Special note; you will need someone to help you attached the body to the box once you are in the box.
CLOTHING
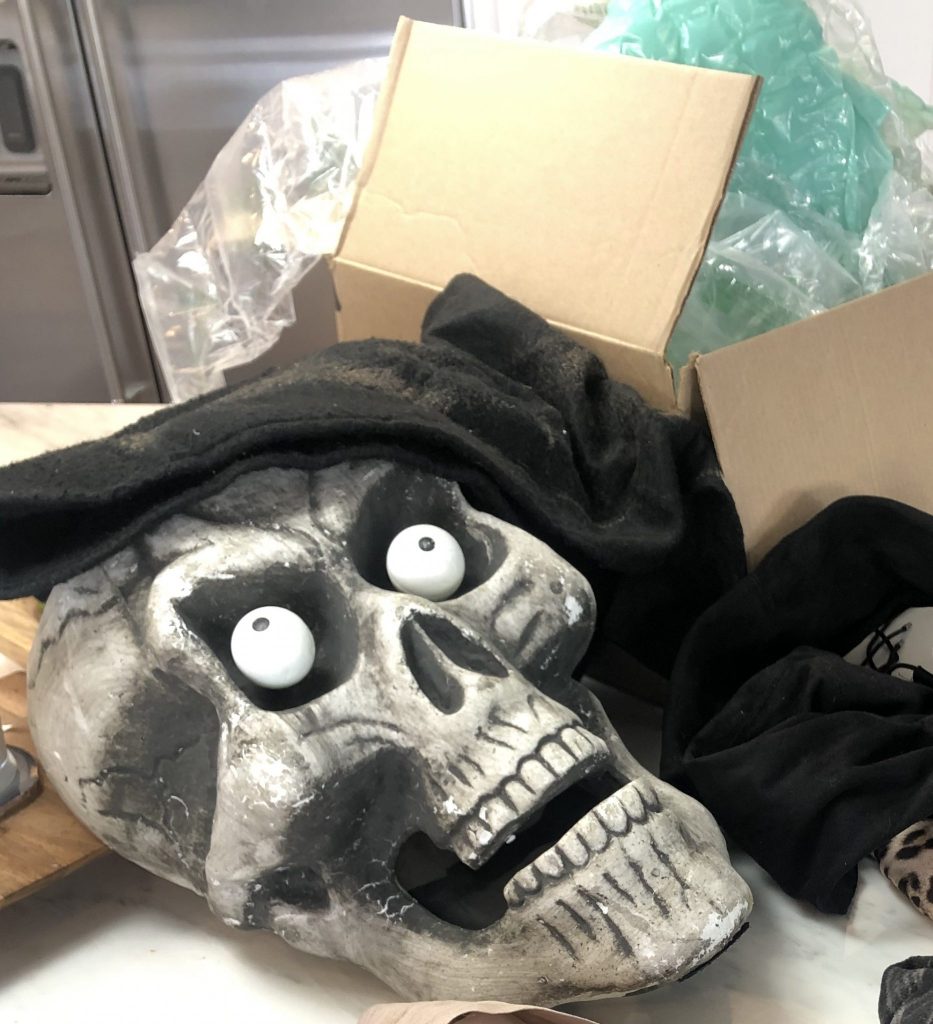
What you will need for head and body top of monster:
- Head with a hat or hood
- Flannel or over sized shirt
- Gloves
For your body:
- Sweat Pants
- Shoes
- Top, whatever you want
Approximate time to make: 1 hour
Step by Step Directions
Make Body
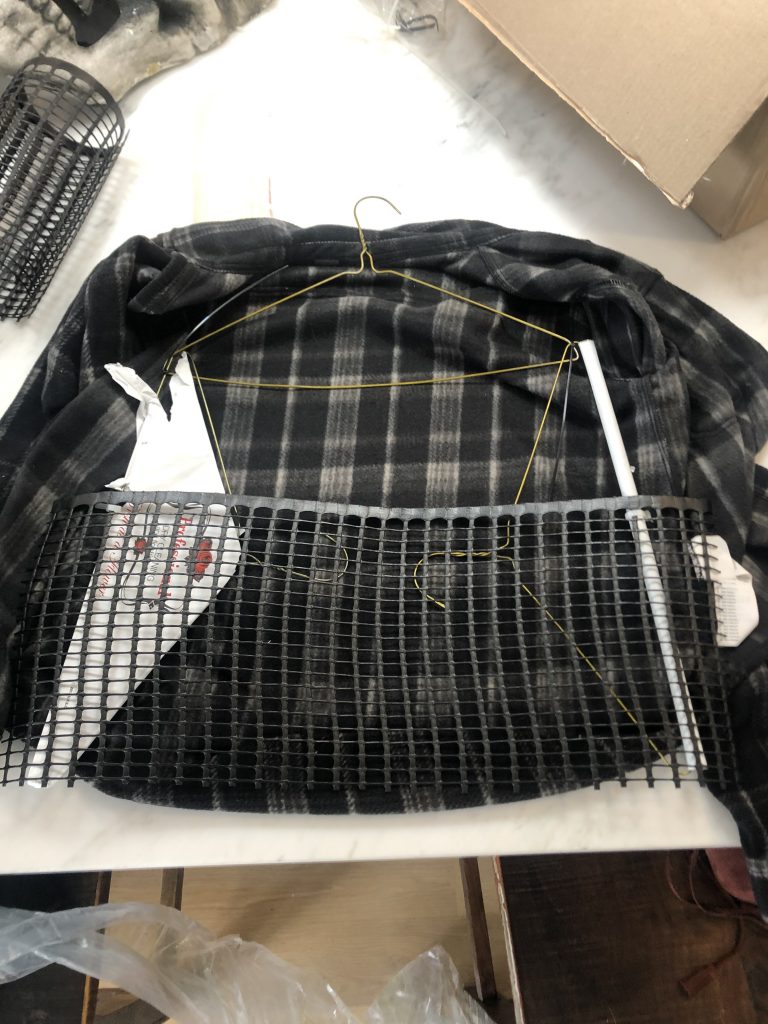
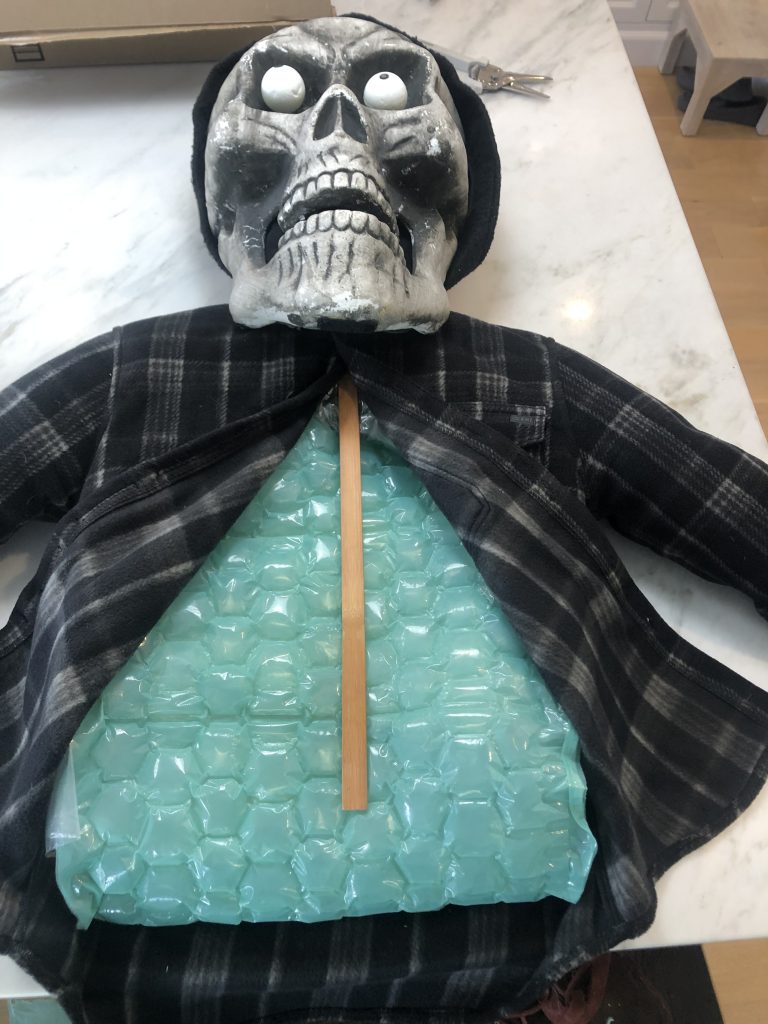
Start with the wire hangers to make the neck and shoulders. Attached the wire hangers with zip ties (see photo). If you have netting of some sort, attached to hangers with zip ties as well. This is the base of your body.
Next, wrap bubble wrap around and over hangers to to form the shoulders and chest, use duct tape too attached and keep in place.

Now it’s time to add the flannel/over sized shirt to the body and attach gloves with zip ties. Once you have the Flannel on the body, you can stuff the arms with bubble wrap/news paper.
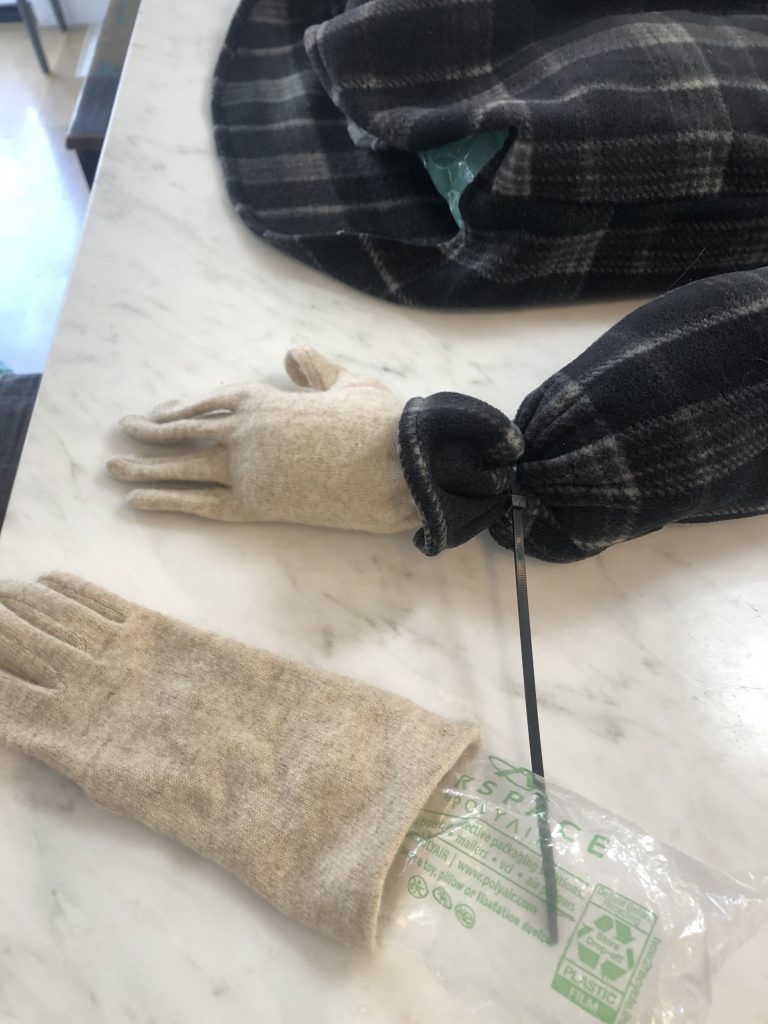
Stuff the gloves first and then attach to the flannel with zip ties.
Next add stick (spine) and head. Make sure the stick is at the top of the head, this will help make it secure. Attach the head to the sick with duct tape.
Box Work
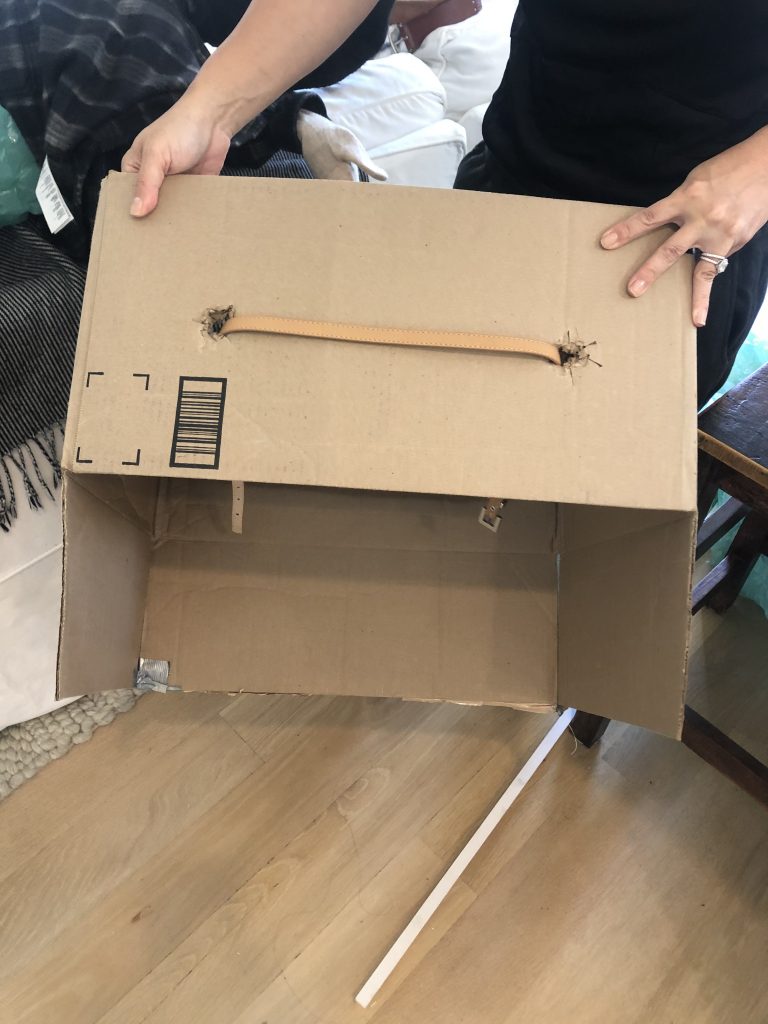
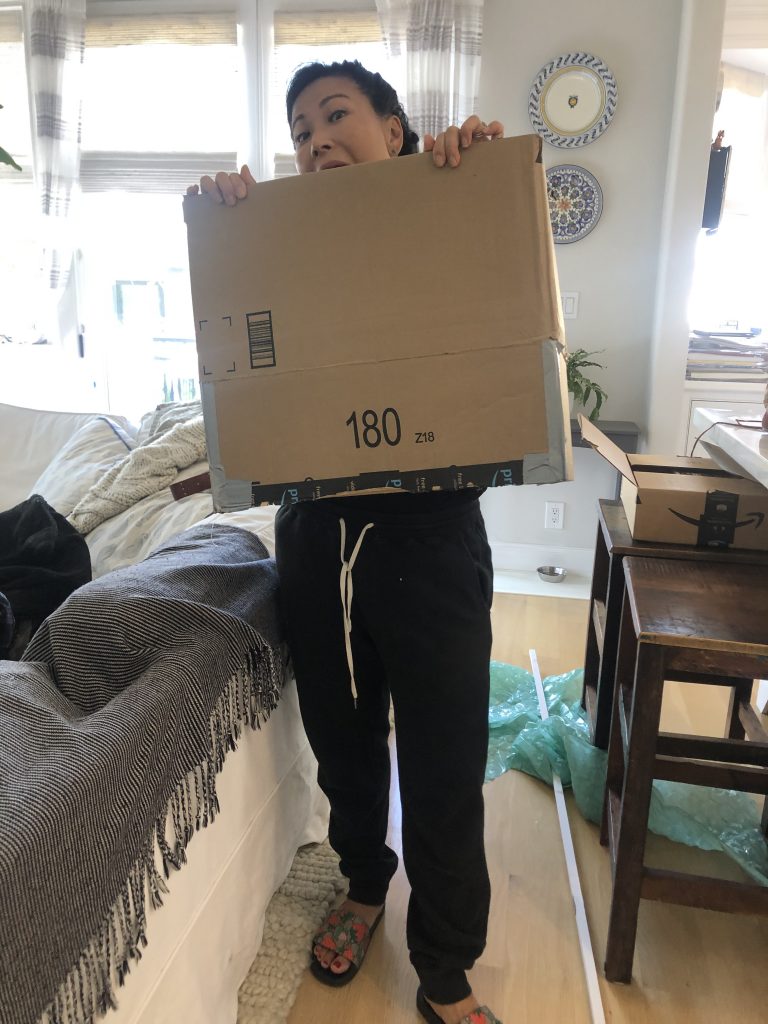
You are now ready to create your box. Make sure to fold in the sides of box flaps. Puncture two holes in the box so you can attach your belt (Be careful!!))
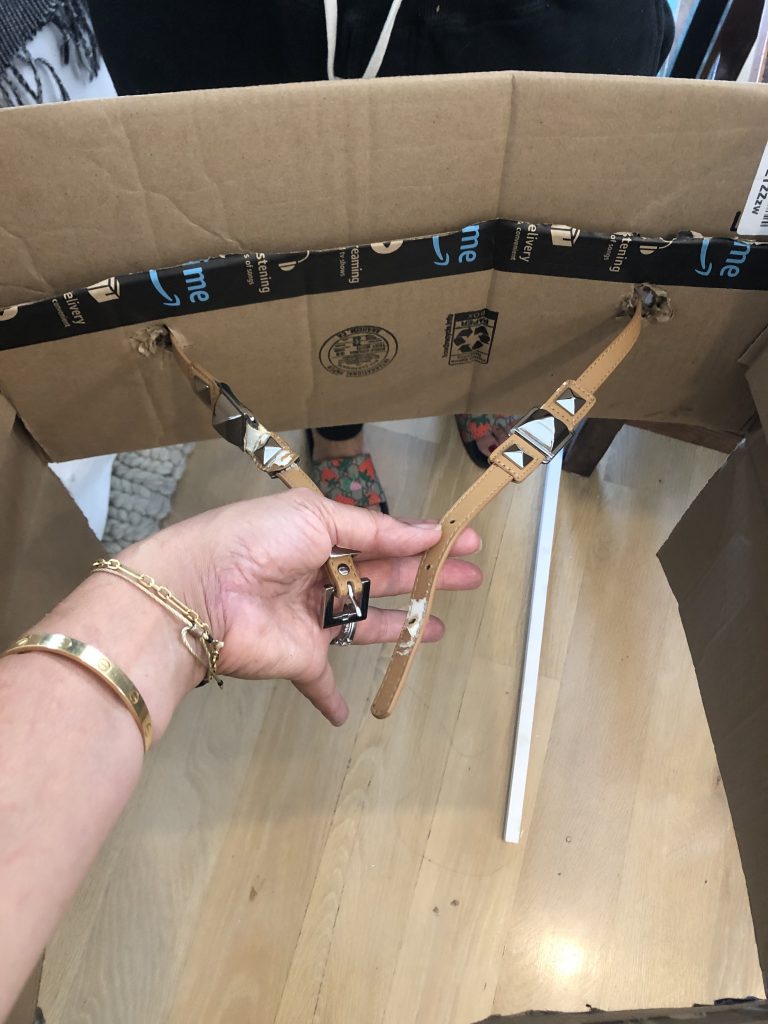
Loop belt through and fit across your chest. Remember, you want to position the box so it sits at your hip line.
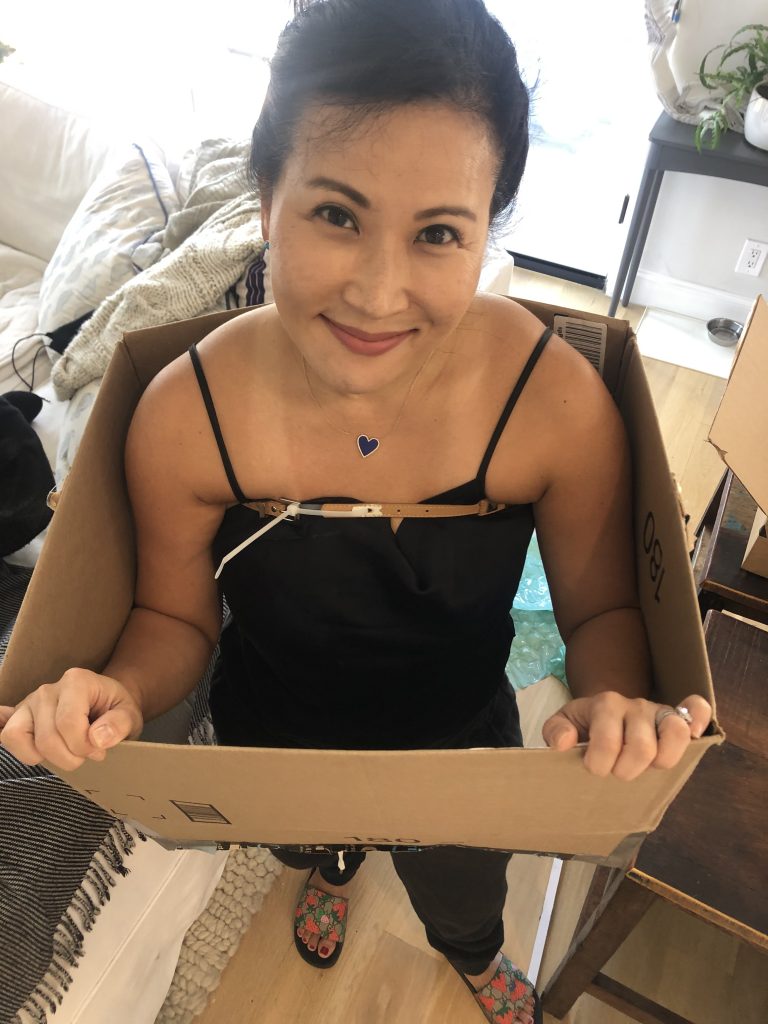
You will now have to get inside your box and have your friend/family member help with attaching the body to the box – get your duct tape ready!
Attach Body to Box

Line up the box and the body, slid the bottom of the stick in between the box and the belt.
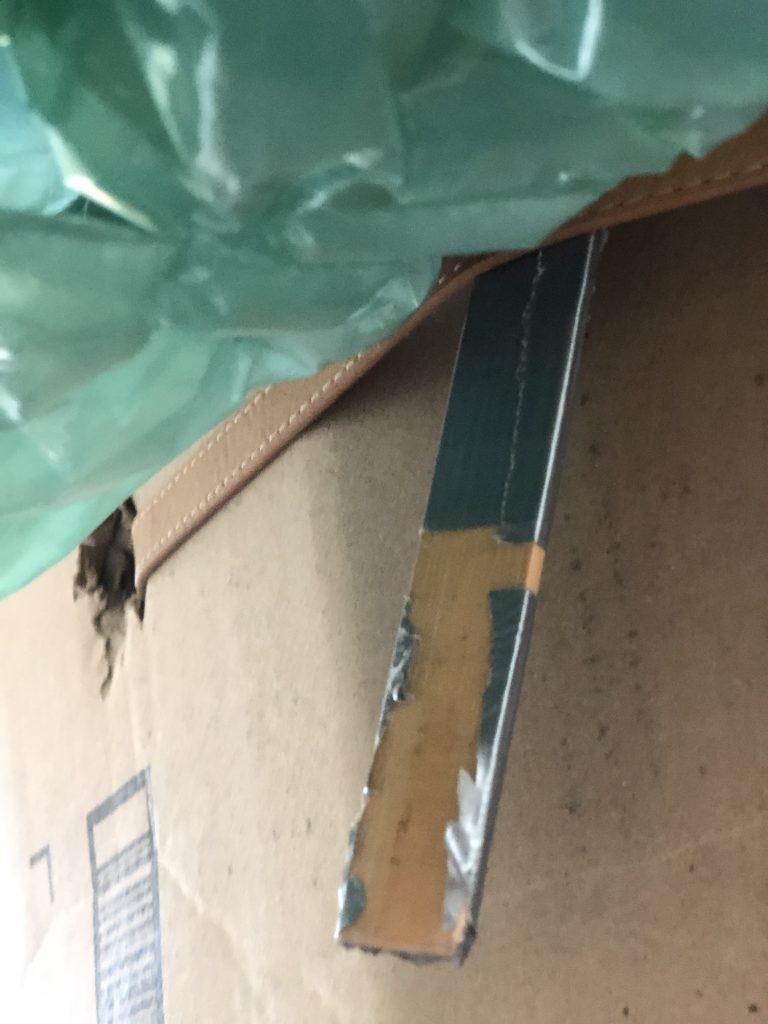
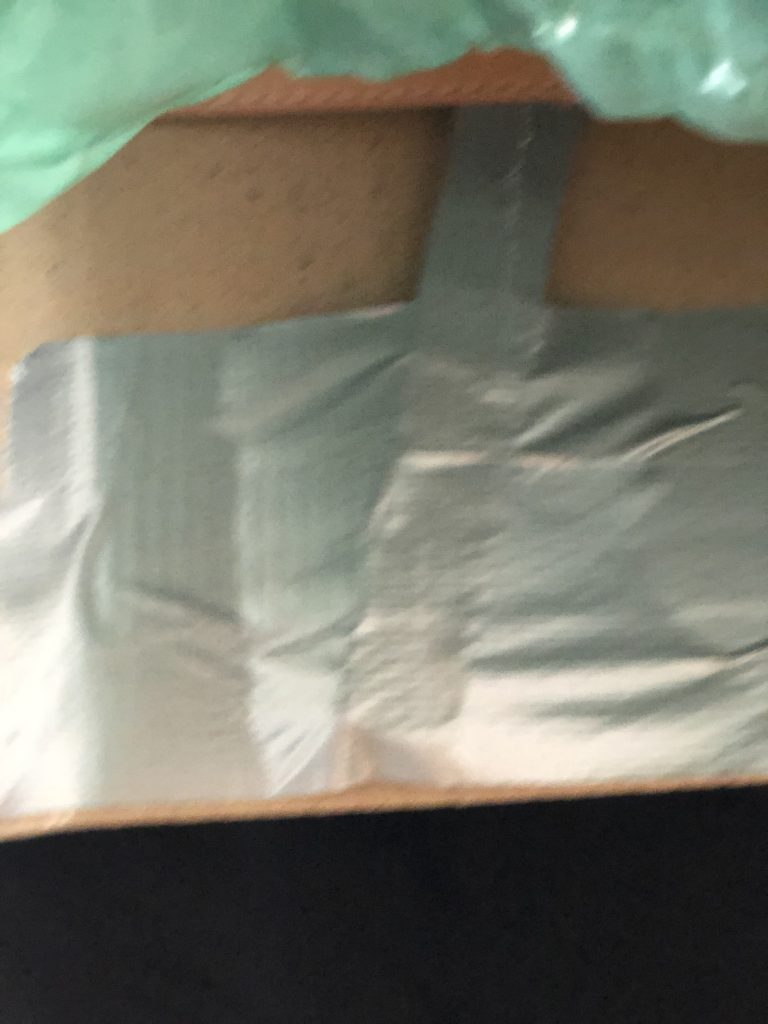
Then layer on the duct tape as far up as you can go.
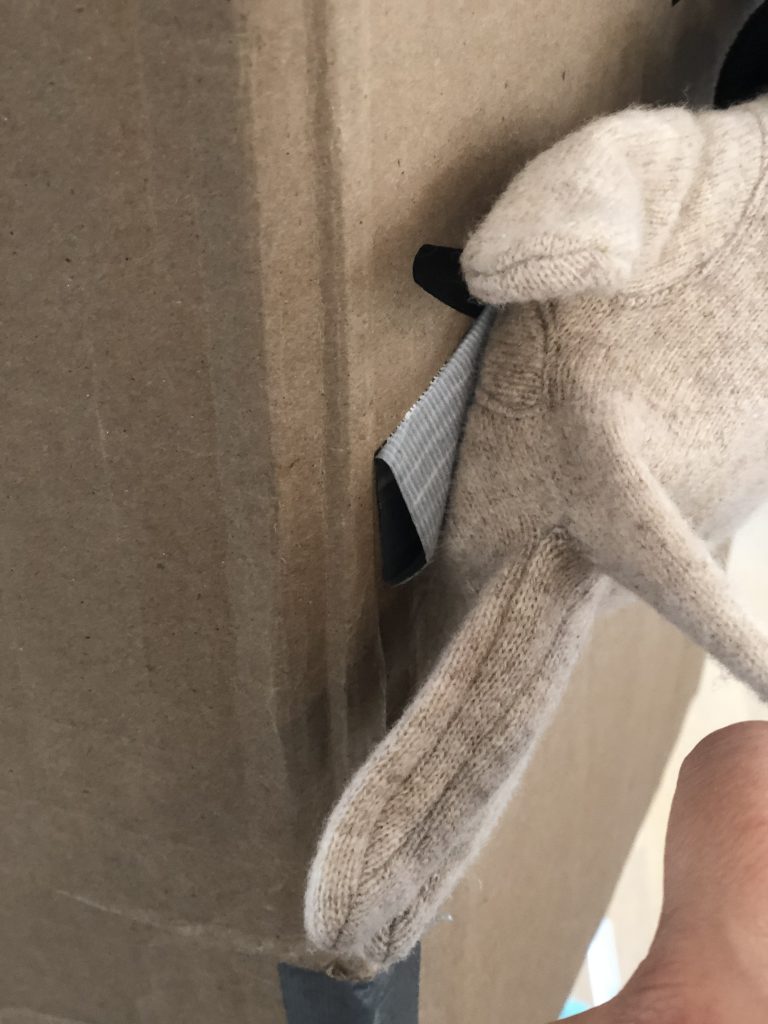
Stick Hands onto Box
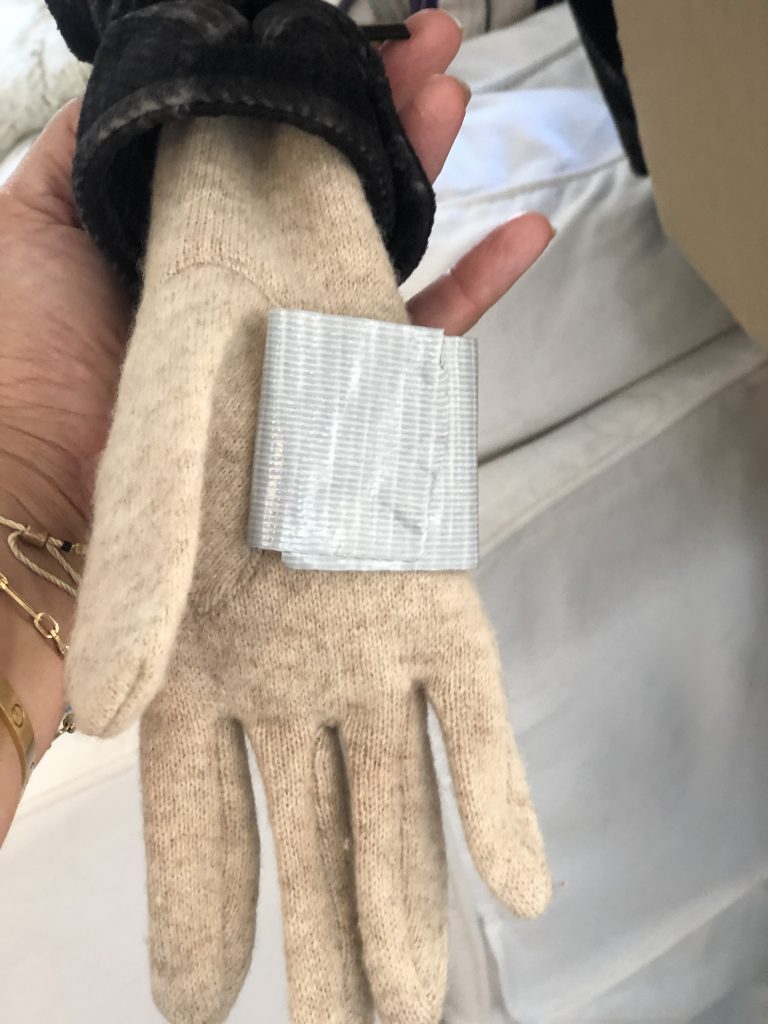
Lastly, roll up some duct tape to the palm side of the gloves and stick to the sides of the box.
Complete!
You are now ready to laugh yourself silly! Happy Halloween friends!


Amazing Job! Thank you for the details, we will give it a try. Where did you get the head?