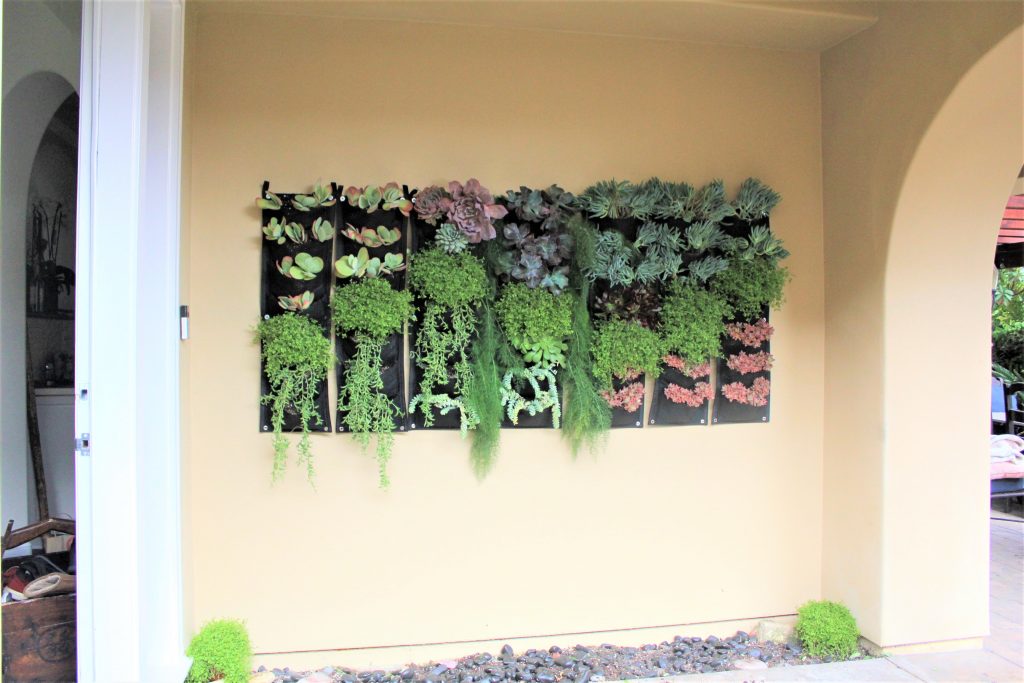
Have you marveled at living walls like this one and wondered how they do it?
source: architectureartdesigns.com
Guess what? You can make one yourself! And it won’t cost you thousands of dollars!
Recently, we stripped our wall by the front door where vines used to grow. They never grew in the way we wanted. Instead, the wall looked bare and uninviting.
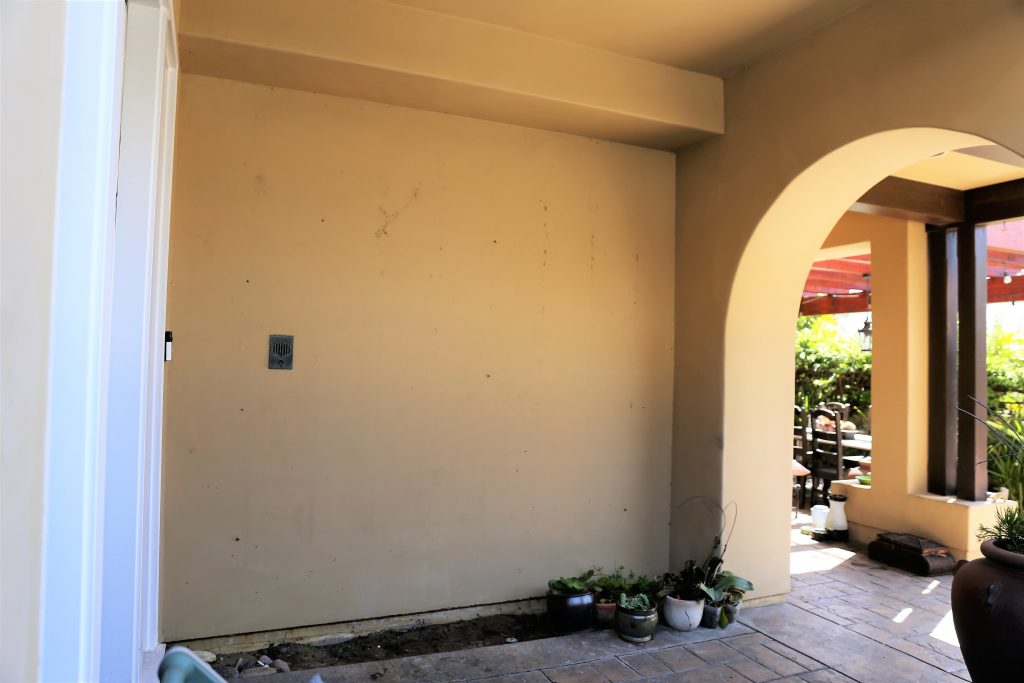
It looked pretty bad. After we took out the vines, my cat decided she would make the dirt area her litter box. She pooped every morning like clockwork to leave a stench which permeated the whole front patio area. It seemed like we were trying to deter people from coming to the front door! It was time to get this living wall project going.
I admired the living wall at the MB Shade Hotel for years, but assumed I needed to hire a professional landscape company to get a similar look installed for my home.
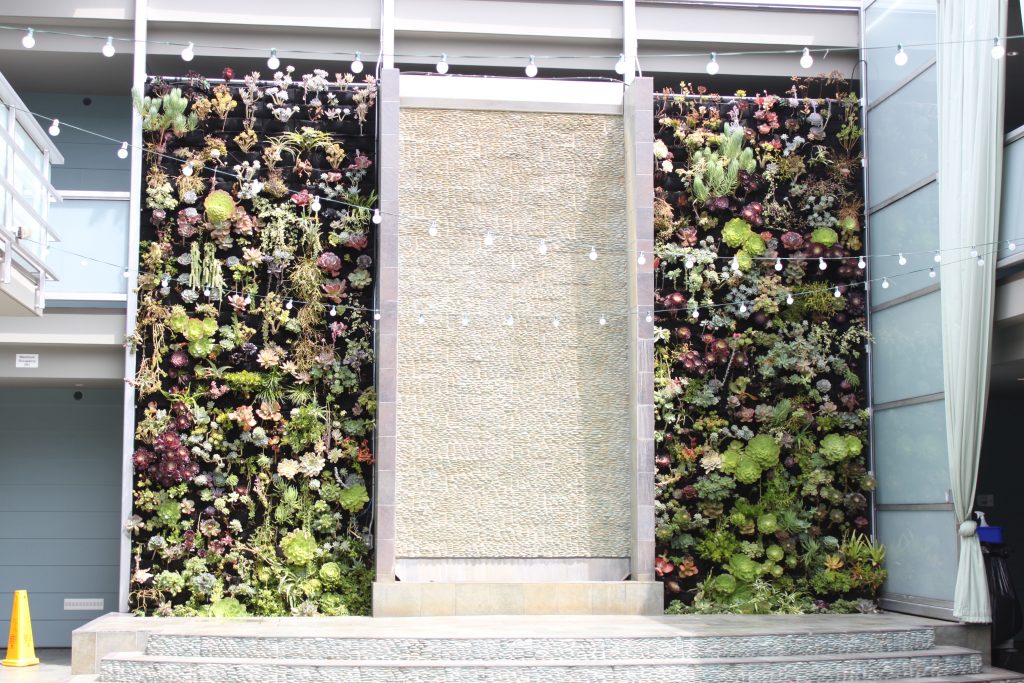
Living wall at MB Shade Hotel
I described what I was looking to make to my DIY blogger friend from Home Jelly, Skaie Knox (fun side-note: I met Skaie after she read my Resting Bitch Face Post from the BlogHer conference we both attended).
Skaie explained this is a simple project I can do easily, as Amazon sells the plant pockets to make living walls similar to the one at Shade Hotel! Well this was great news – and I found many different sizes of planter pockets on Amazon. I ended up buying vertical pockets which have 7 pouches.
I wanted to cover the whole 9ft x 9ft wall but I was afraid the plants might not do well once planted. To be safe, I ordered 7 pocket sets to install at the center of our wall. These pockets are sold in 2s, 3s, individual, vertical, horizontal, you name it. So it’s easy to add on pockets later.
On a scale from 1-10, my gardening skills are a 2. My DIY crafty build-y skills are maybe a 2.5. So before I take on any related project, it must be clear how easy it will be, or I will not commit.
Directions for DIY Living Wall
I taped the pockets onto the wall to see how the pockets would look once installed.
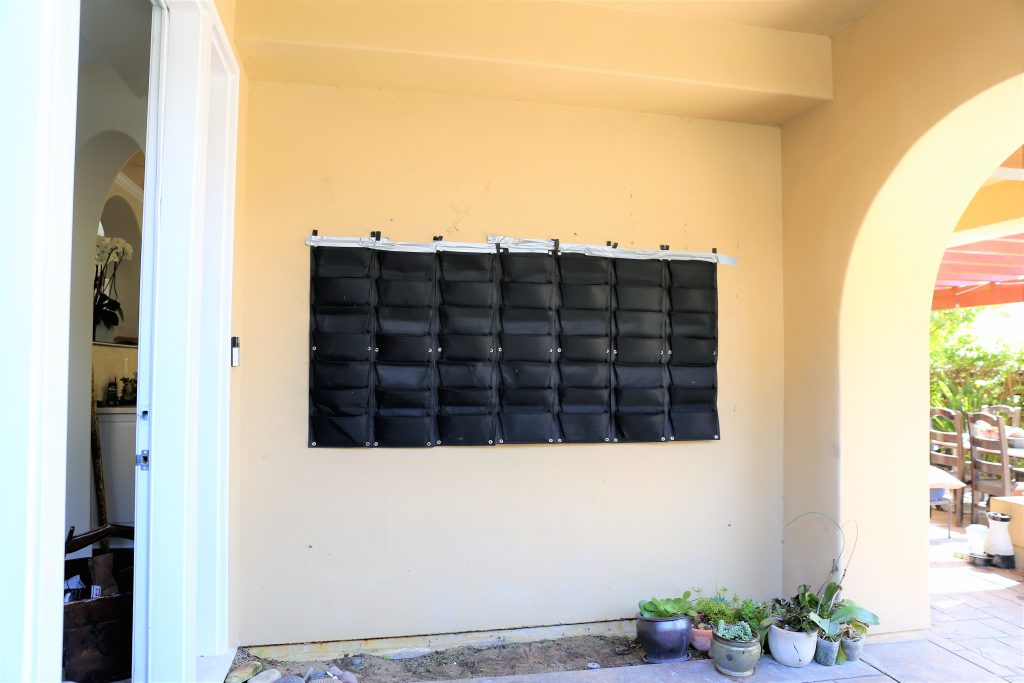
I hired a handyman to nail the pockets into the wall.
Then it was time to find succulents at the LA Flower Mart (See my post about how to shop there). I am lucky to have a friend, Linda, who used to own her own flower business. She accompanied me to pick out plants for my living wall. I wish they had more of a selection of succulents at the LA Flower Mart, but we were able to find some plants.

We fell in love with these Salaginella plants. They are in the fern family and require more water than succulents but do well in shade. I loved them so much, I had to get them.
How to pick plants for DIY Living Wall
Linda explained how we want to create waves of like flowers/plants. To accomplish this, and depending on the size of the wall, she said to look for the following points in choosing plants:
- They need to share the similar maintenance needs (shade, full sun, water, etc)
- Choose different colors
- Choose short and long
- Choose different textures
- Do not get plants that are too delicate
- Choose plants that will grow and eventually cover the black pockets
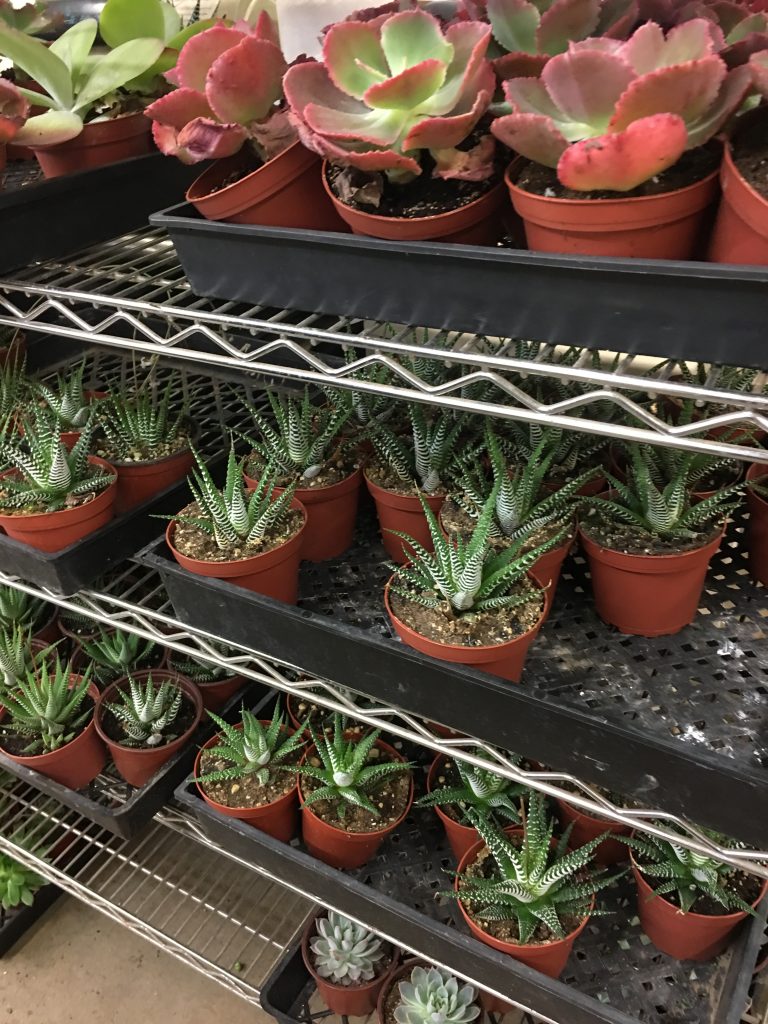
I loved these haworthia plants but they were not a good choice as they are very slow growing.
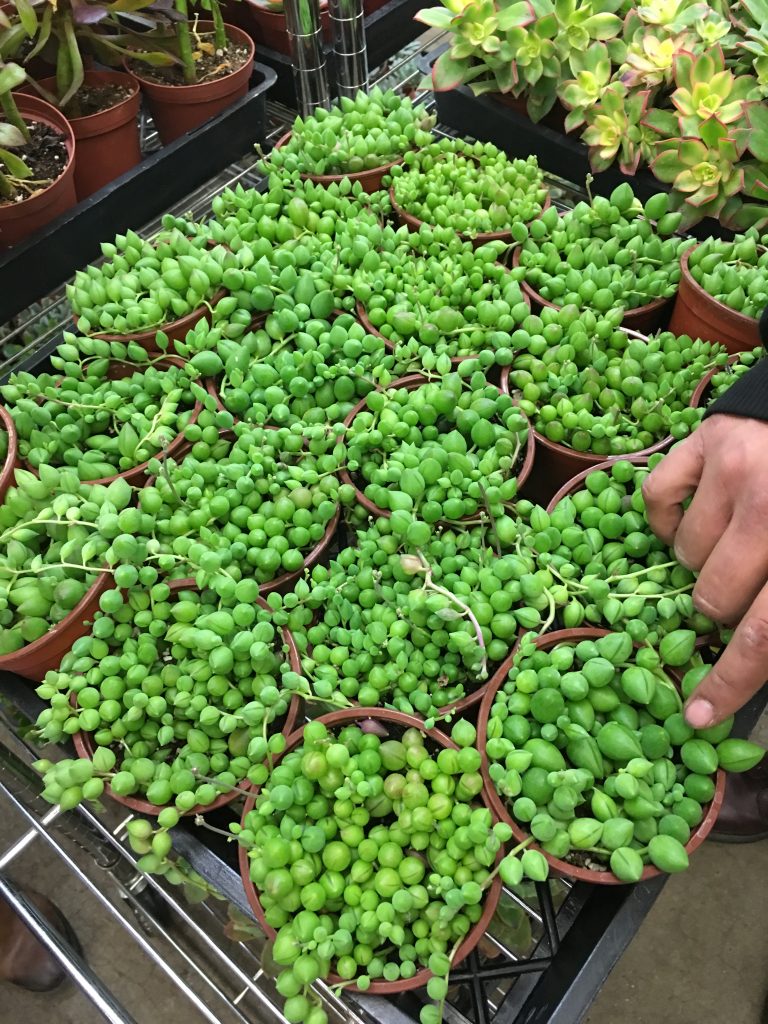
These string of pearls senecio succulents were so beautiful, but too delicate to use for the living wall.
Linda wanted to draw out a design, measure and count the plants per the number of pockets we needed. As she was talking to me about this, my eyes glazed over. Although I knew this way of planning was necessary for the best outcome, I told her I wanted to just “wing it” as I couldn’t focus hard enough to do all that.
We settled on this assortment of plants to begin. Pretty, right?
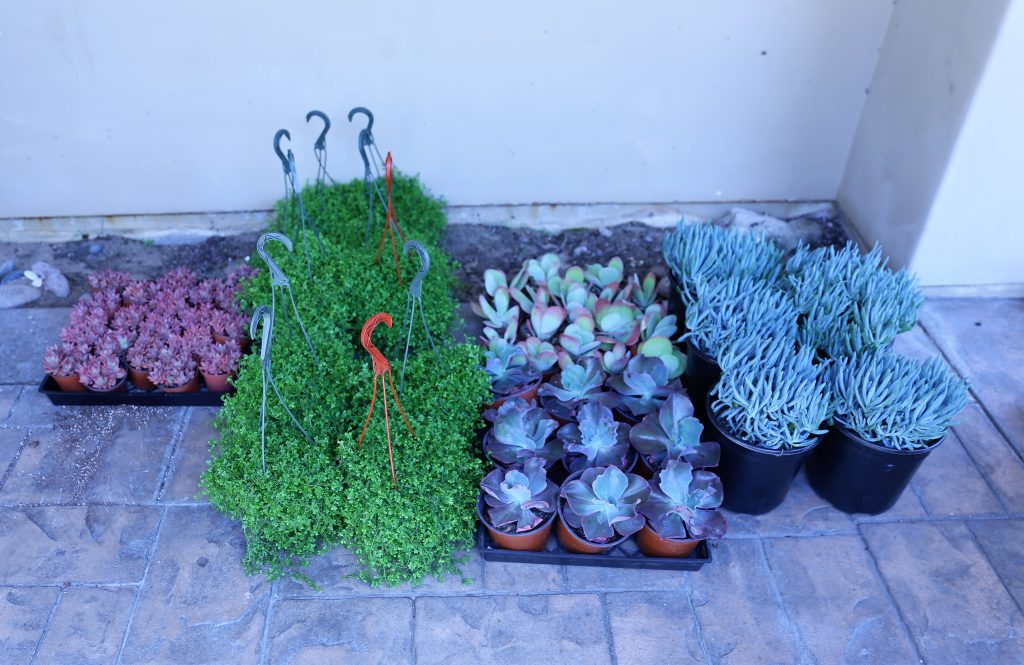
Echeveria Perle von Numberg, Selaginella, Flapjack, Ice Plant,
It was time to design my wall. Here is the progression.
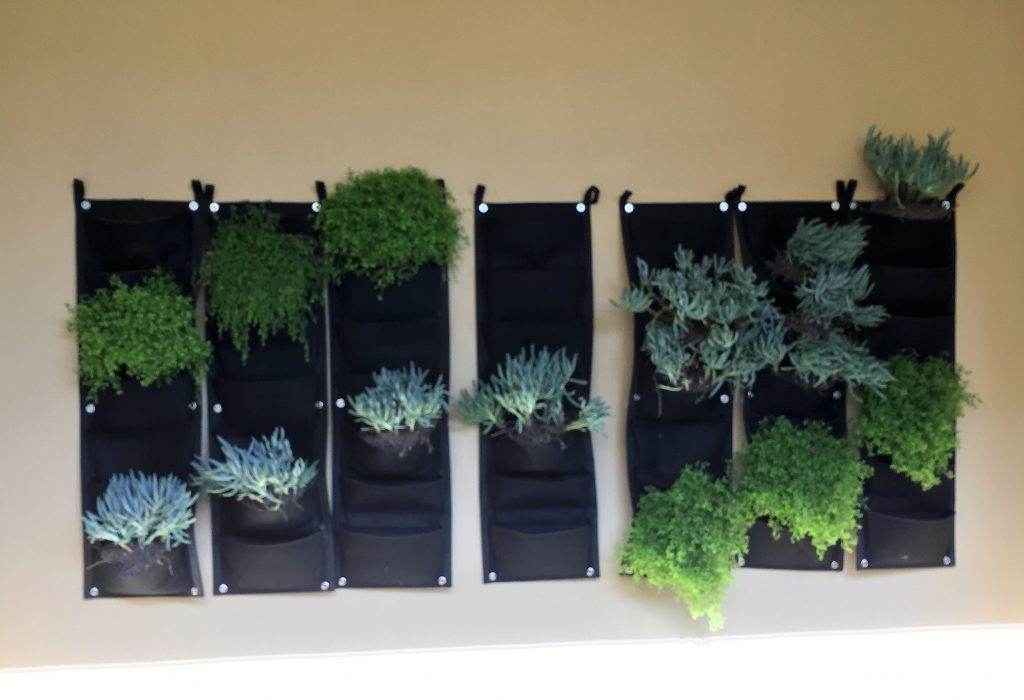
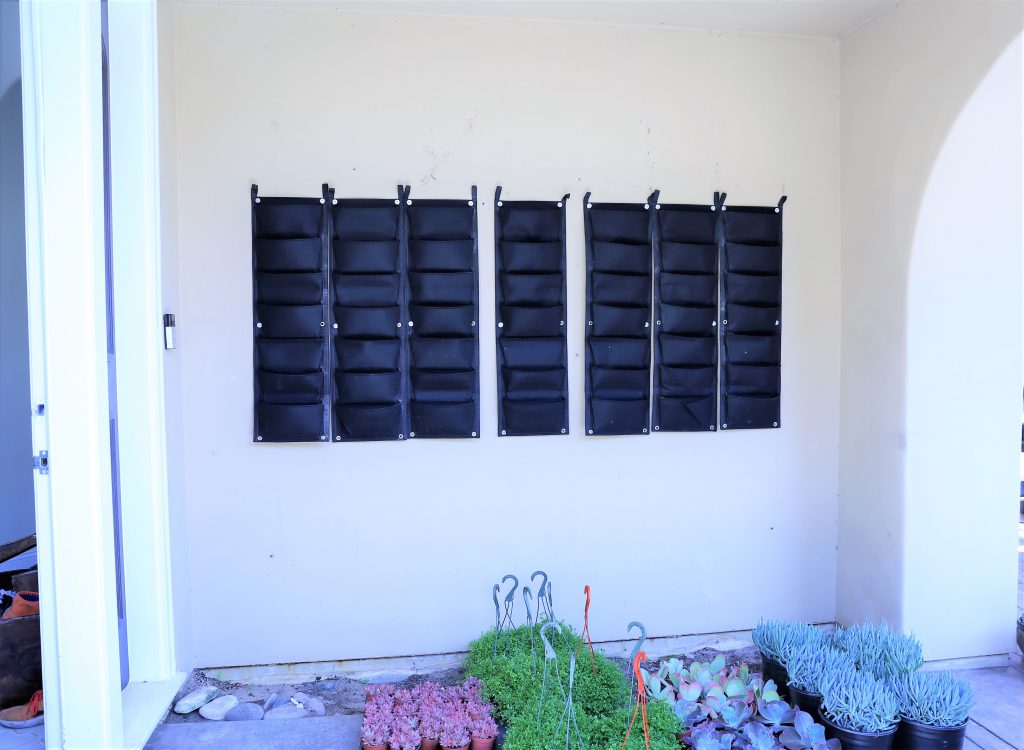
I started by trying to create a wave in the middle as the center point, then filled the pockets based on trial and error.
First pass at living wall design.
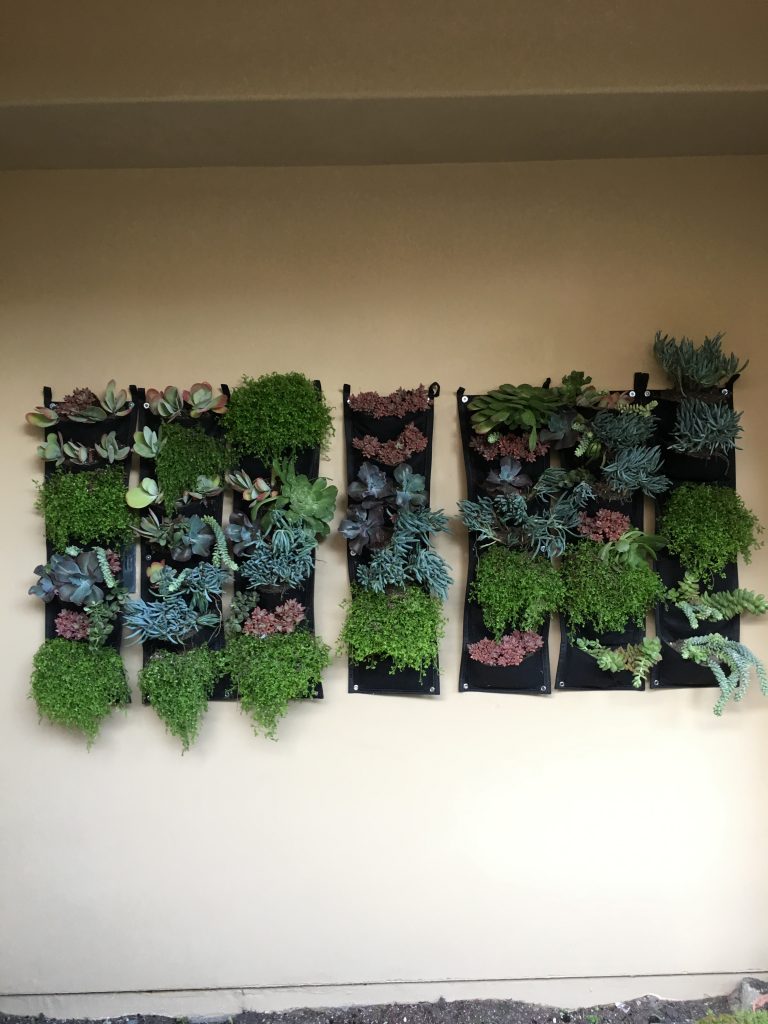
I realized the next morning, what I did the day before did not look good. I also noticed I had overfilled the pockets with soil which made the pockets lose their linear shape. I started over, focusing on grouping like plants together on each side of the “wave” at the center. Then I went out to find more plants to fill the remaining pockets.

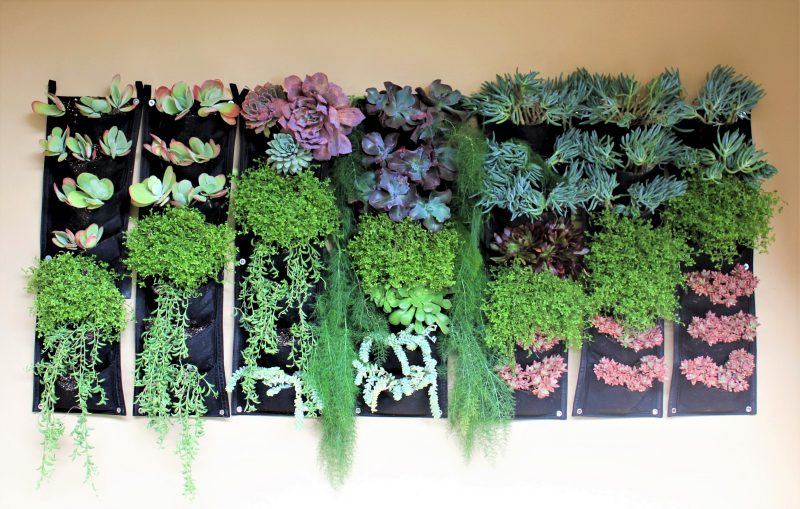
Much better, right? Finished product below.

What do you think?
As for the ground part where my cat has been pooping, I put a sheet of large black river rocks I found at Home Depot. I am hoping the stone surface will be unappealing to her. We shall see!
The following video is a compilation of my Insta-Stories as this DIY Living Wall was coming together.
I still have a few pockets to fill but I’m really happy with how my DIY Living Wall turned out! I will wait a few months to make sure the plants will thrive here and then start to cover the rest of the wall.
Are you ready to try this too? Trust me, if I can do it, you can definitely do it too! Let me know if you try it, ok?