
Have you always wanted to use a camera in manual mode but didn’t have the patience to figure it out? I have owned my 35mm camera for over 10 years, but always used it on auto (or if I felt fancy. I’d take it up a notch by using the portrait, landscape & sports icons on the wheel).
When I would ask a knowledgeable person about camera settings, my eyes would quickly glaze over after about 10 seconds of listening to their answer.
When I started working on this blog, I decided it was time to learn how to use a camera in manual mode. Luckily, my friend Benjamin Benoit has a monthly photography class. I signed myself up.
In the three hour class with Ben, I learned how to use a camera in manual mode! I will have to refine my skills with practice. But the fact that I was able to walk away from the class understanding Aperture, Shutter Speed, ISO AND how to use these functions outdoors was gratifying.
I was impressed with Ben’s teaching style. He breaks things down into ways the average person can understand. He also repeats the concepts in different ways throughout the class so they ingrain into your head. Finally, he makes it fun with his lighthearted approach to teaching.
If you live in the South Bay Los Angeles area and are interested in learning photography, take Ben’s class. If you are not close but still want to learn about photography basics, I have outlined what I learned below. Don’t be too hard on me because this summary is literally just from taking the 3 hour class.
First, do you know what the buttons mean on your camera? Click here for more information on what each button means. Every camera is a little different, but the functions of the buttons should be the same. I have the Canon Rebel T2i DSLR camera.
It is best to figure out your camera’s functions before reading further so you can play around with it while reading. Then, find out how to get onto the settings screen on your camera. On my camera, I push the menu button and it rotates different screens.
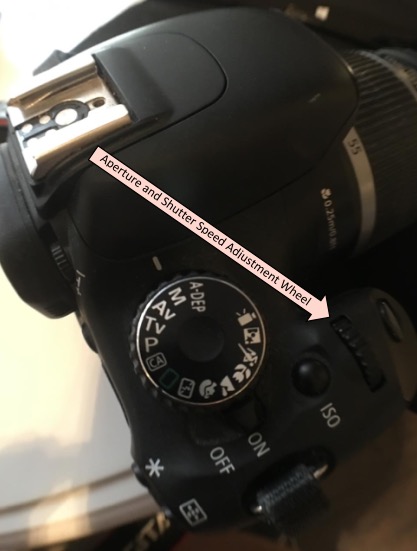
The up/down control dial to adjust the shutter speed and aperture is the wheel toward the front of your camera near the picture capture button. There should be an ISO button close to the wheel to push when you want to adjust the ISO.
Ben handed out a summary sheet at the beginning of class as a reference point for the things we would learn.
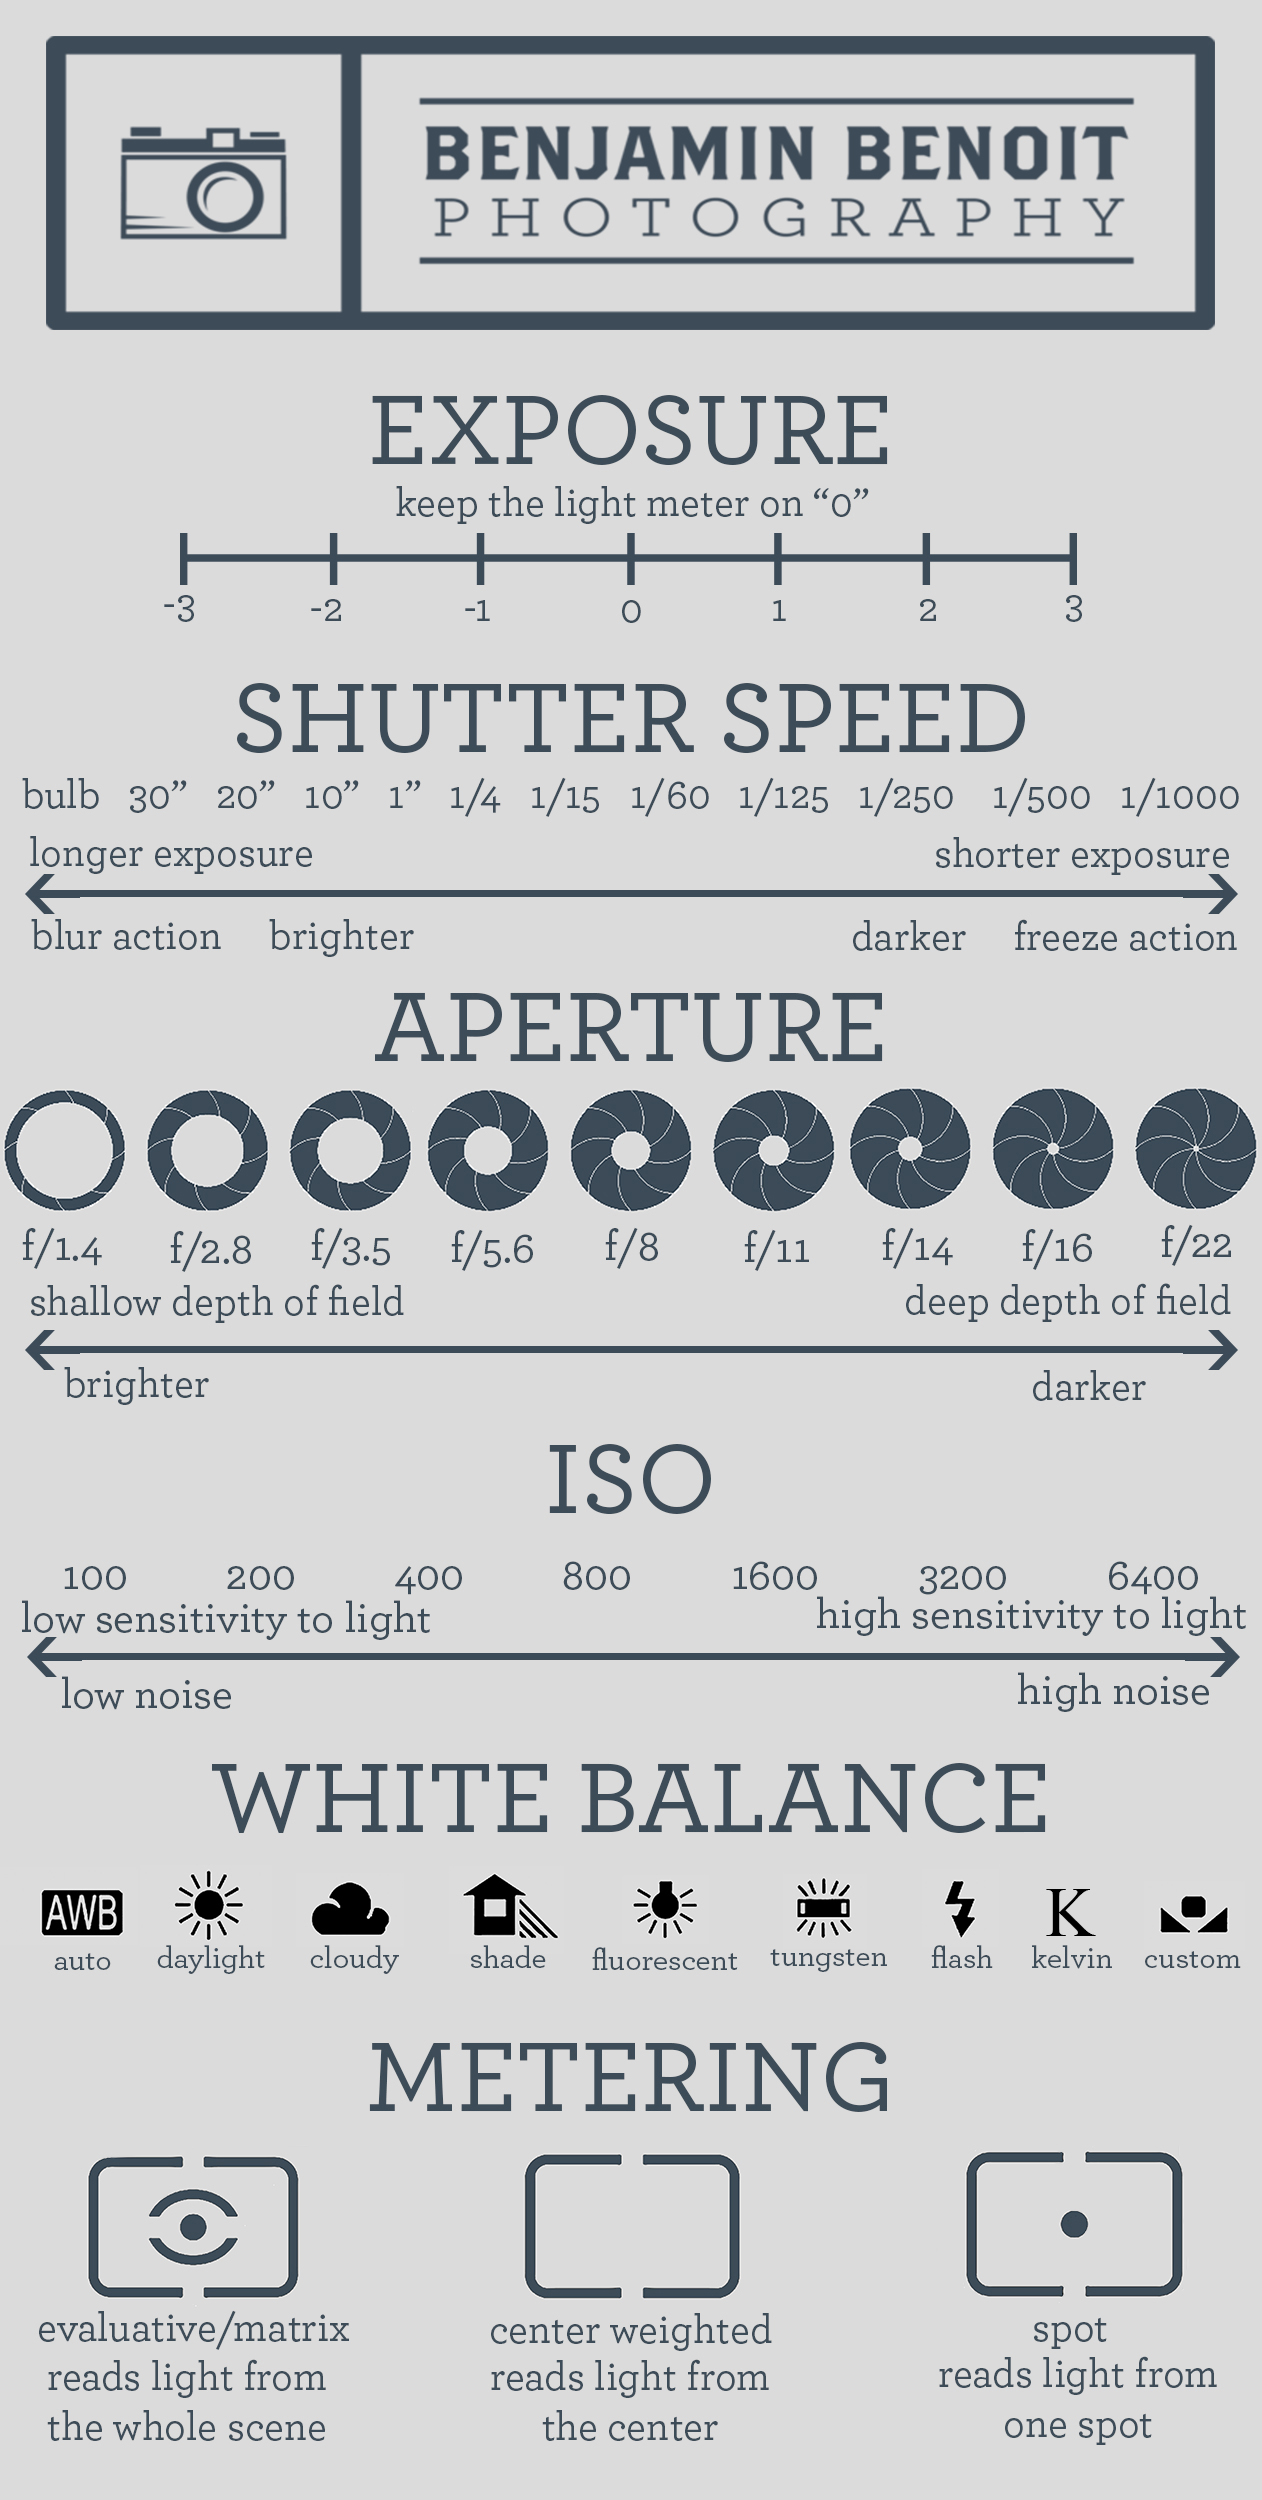
Exposure: When you look into the lens of the camera, the screen will have a meter on the bottom that has a line ranging from -3 to +3. Based on the settings of aperture, shutter speed, and ISO, the camera will meter the current exposure. For instance, the marker may be at -2. We want the marker to be at 0.
You will need to adjust the shutter speed, aperture, or ISO to get the marker to 0 so the exposure is optimal. You adjust this according to the type of picture you want to take.
Generally, you will know what ISO you will be using based on the picture type you want and the setting you have (to be discussed more below). You will also have an idea of the shutter speed based on the type of movement you want to capture. That would then leave aperture to be adjusted up or down to bring the meter to 0.
If you are shooting a still shot of an object, you would know what aperture you want to use, which would leave the shutter speed to be adjusted up or down to bring the meter to 0. Once you have the meter at 0, Snap! You have your shot.
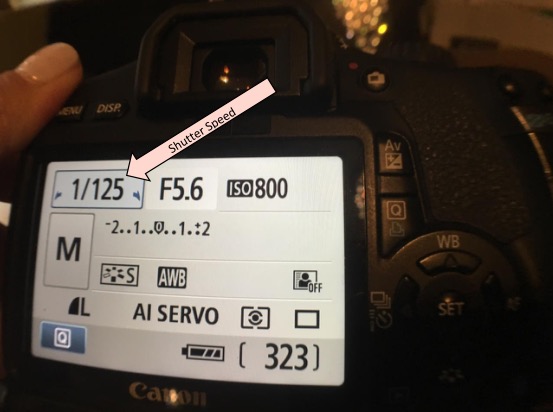
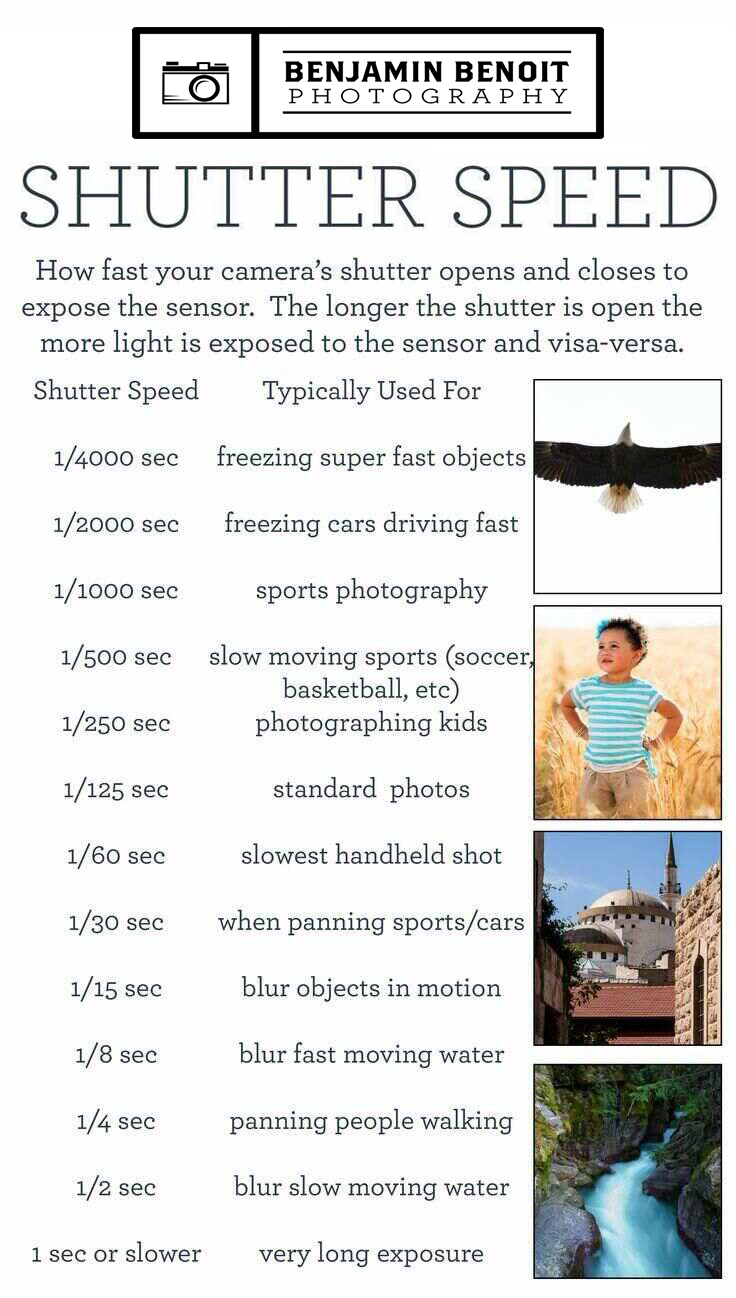
Shutter Speed: This controls how much time the camera shutter is open during a shot. The speed goes from long to short, which gets confusing because we are used to seeing scales from short to long, right? It goes from Bulb (we don’t need to know what this means for basic photography) to 30 second (long) exposure to 20 seconds and so on until 1/1000 of a second (short) exposure.
The longer the shutter speed, the more blur action of movement (example, water) the picture will capture. The shorter the speed, the more frozen the movement will look in the picture. The longer the speed, the brighter the picture (since the lens is open for longer). The shorter the speed, the darker the picture.
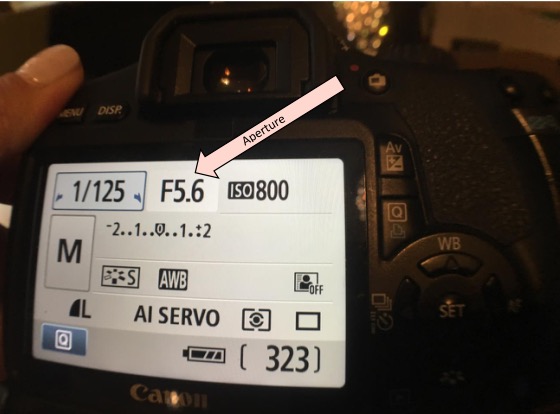
Aperture/ F-Stop: This regulates how much light comes into your camera. This setting controls the “depth of field,” which is how much of your object is in focus.
The lowest setting will give you the most shallow depth of field and more light (ex. everything is blurred behind a head shot). The highest setting at F22 will give you the deepest depth of field and less light (ex. a landscape shot of the ocean).
I feel like this concept was hardest for me to grasp because I didn’t understand why more light let into the camera (low aperture) would blur objects in the background. Ben explained that this is due to the admitted light being “collimated”. When he went on to explain what collimated light means, he lost me. So, let’s leave collimated light for photography 102 in the future.
Shutter Speed and Aperture are Conversely Related. The lower the aperture, the faster the shutter speed. The higher the aperture, the slower shutter speed.

This picture was taken with aperture/ F-stop on the lowest setting of 1.8. See how the background is blurred? Basic cameras’ aperture settings won’t go below 5.6. The effect will still work with a 5.6 setting, just not as dramatic. My Canon Rebel T2i only went down to a 4.5 so I ordered a new lens for my camera which has the lower aperture function (I found it here) from Ben’s recommendation.
ISO: This is your camera’s sensitivity to light. I know. Isn’t it confusing since we just learned that aperture regulates how much light comes into your camera?
The easiest way to think of ISO is that low means you have a lot of natural light already and you go up from there based on how much light you need. Indoors in a setting that isn’t well lit would require a high ISO.
Ben explained that when outdoors with a decent amount of sunlight, the best setting for ISO is 100, which is the lowest setting. As it gets darker out, maybe 200 ISO will be necessary. Indoors, we would start the setting at 400 and then adjust higher depending on the light.
The problem with ISO is that at higher levels, grains in the picture show up. So if you have that great vacation shot you want to blow up but it was shot at a high ISO, the picture will show lots of grain when enlarged.
Rule of thumb is the less ISO, the better the picture sharpness.
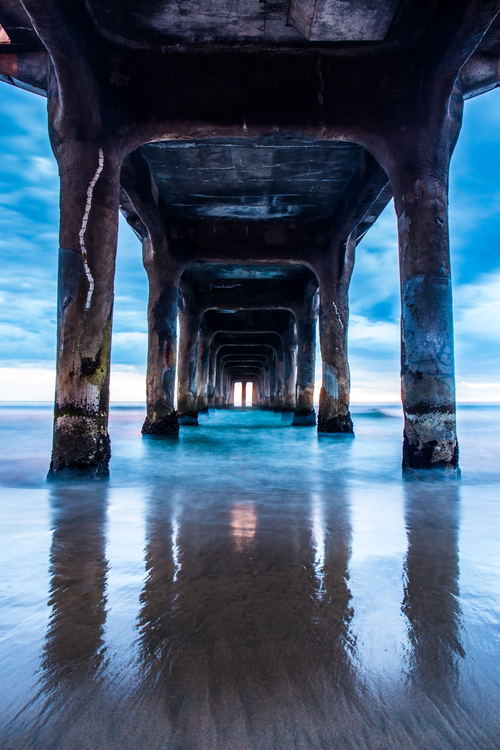
This picture was taken using a wide angle lens on a tripod. The aperture was on F22, which is the highest setting. Ben explained that F22 is the best setting for landscape shots as it will capture all of the detail in the picture.
This setting, along with an ISO of 100 in an outdoor setting will allow a picture to be blown up into poster size and remain clear with little or no grain.
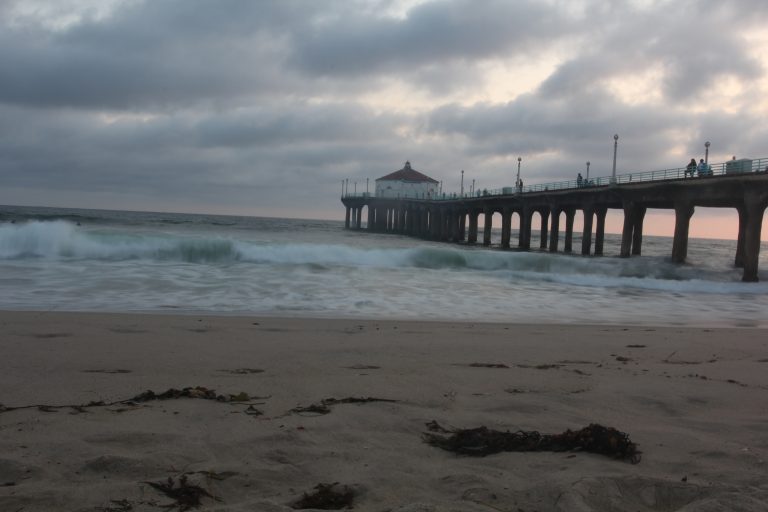
In landscape pictures where you want to capture movement, it is important to put the shutter speed at the slower settings.
The shutter speed for this shot was set at 4 seconds. For shutter speeds less (slower) than 1/60th of a second, the camera needs to be placed on a tripod to be still. If you use your finger to push the button, the picture will come out blurry.
We set the camera on a 2 second delay to start shooting after 2 seconds from pushing the button to avoid a blurry shot. Until this point, I didn’t understand why people used tripods!
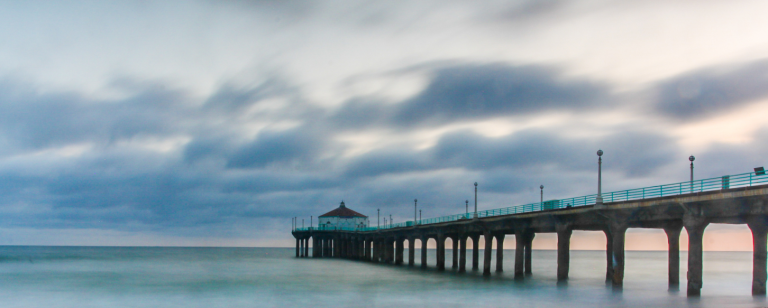
As explained above, the slower the shutter speed, the more blurred moving images will appear in the picture. If the speed is slow, any moving objects will disappear. For instance, the pier in the picture above had many people walking on it. But since we set the shutter speed to 30 seconds, the moving people faded away to nothing. And the waves look calm. So cool!
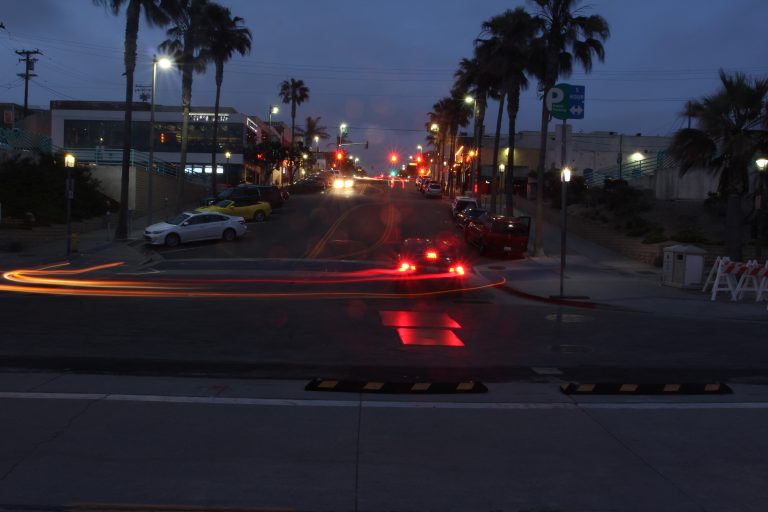
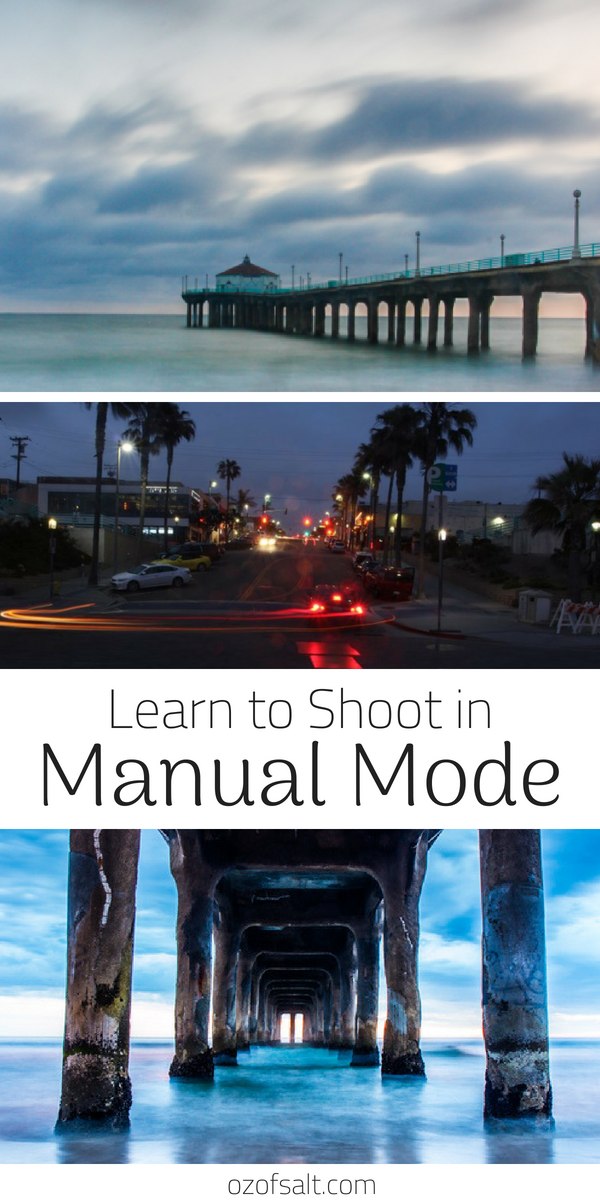
This is a 13 second shutter speed to capture the lights on a moving car. He did a u turn, can you see?
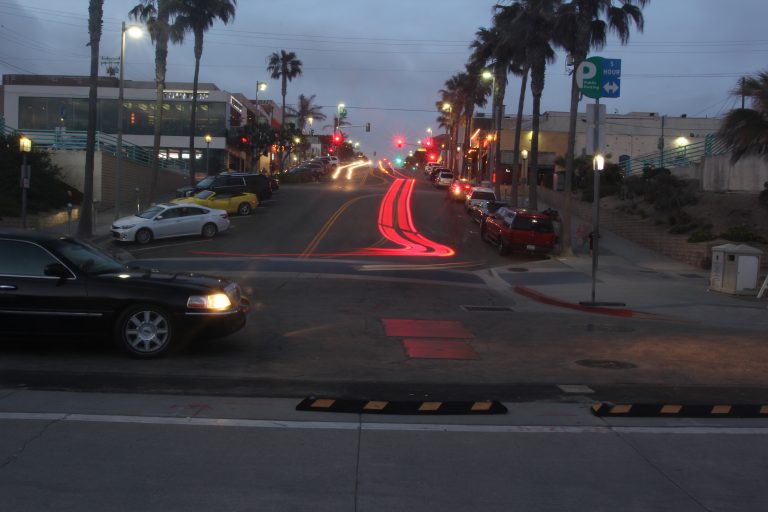
In this picture, the limo stayed still so it shows up in the picture.
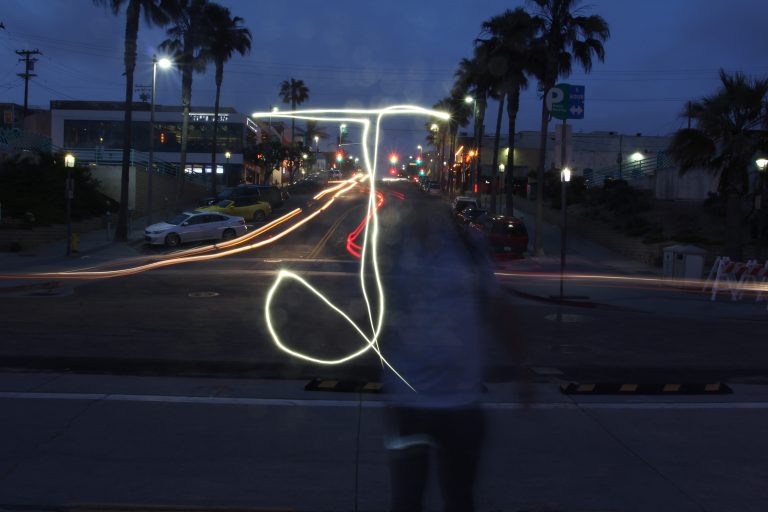
Ben showed how this long exposure setting essentially erases him and shows just the moving light. This is a 15 second exposure with him air drawing a “J” with an iPhone on flash light mode. He stood somewhat still so he appears in this shot. But do you see how he is almost invisible?
The final two items to discuss are White Balance and Metering. Ben discussed how we can leave the White Balance setting on auto as the camera will be good at picking this setting on it’s own.
Metering refers to the faint box outline you see in the lens when you are focusing on a picture. When there is an eye in the box, it means the lens is reading light from the whole scene and so forth as shown in the picture above.
So what do you think? Can you use these steps to take your own pictures on manual? I hope so. I will practice my new skills too and provide an update in the future! Will you share your progress too?
Click here to learn how to navigate the Canon Rebel T2i!
If you want to learn more about photography, I recommend Creative Live. They have great classes I have taken!

Flavor Your Life with an Ounce of Salt. A lifestyle blog by Jen Oliak


this post is awesome! The infographics help out a ton! Thanks for sharing those.